

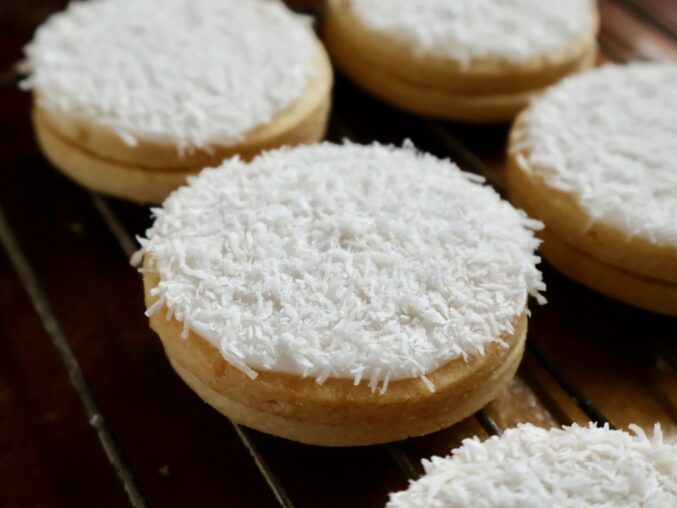
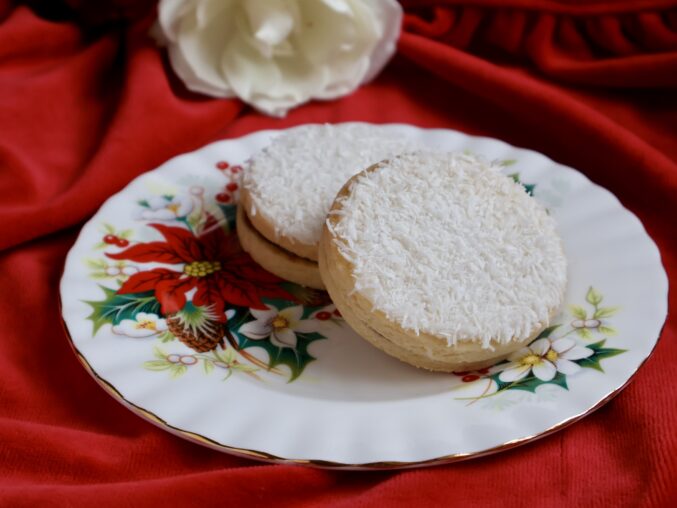
Snow Cookies, an LA Times Holiday Cookie Bakeoff Winner
Snow cookies are made using a recipe I created to imitate the flavors of a Snow Cake my mother used to make when I was a little girl. It’s now an award winning recipe!

Make these snow cookies wherever you live, for a bit of Christmas cheer whether you’re in shorts or sub-polar temperatures!
As an Amazon Associate I earn from qualifying purchases.
I suppose for native Californians, 80-degree days with flowers blooming in December and dining alfresco for Christmas dinner is normal. As a non-native, I have become accustomed to the lack of “winter,” but I think Christmas is the only day of the entire year when I would still like to see snow on the ground.

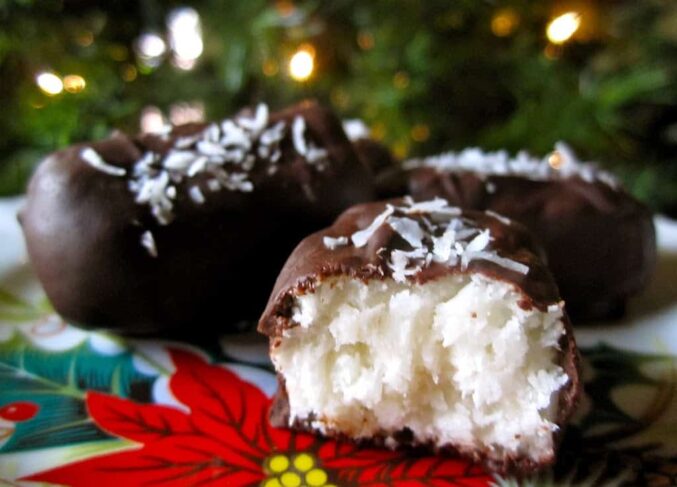
Another raspberry and coconut Scottish delight: Scottish snowballs!

Of course, I’d want it gone by the next day, so I’m really not complaining about the lack of wintry weather (that’s why I moved here in the first place) it’s more of a lack of “feeling” or the atmosphere of what I grew up with as a child.
Scottish Snow Cake
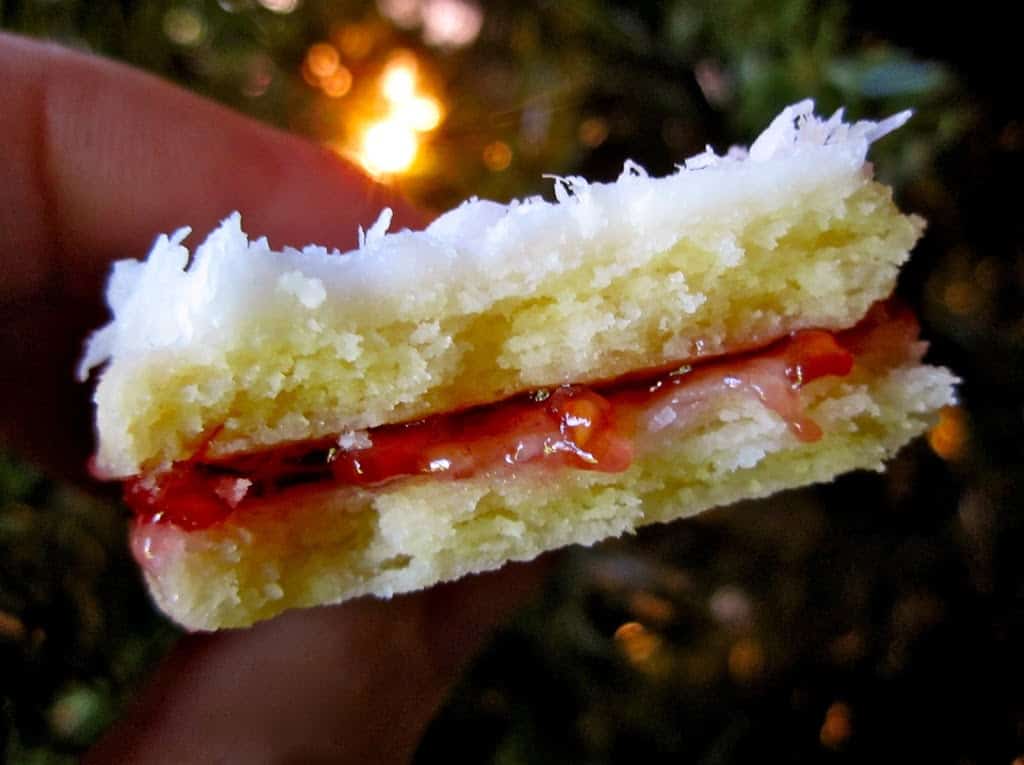
When I was a little girl in Scotland, my mother often made a snow cake, which had a biscuit (cookie) base, a slathering of raspberry jam, topped with a layer of cake, and crowned with white icing and shredded coconut. I have always been smitten with coconut, and I just adored this cake.

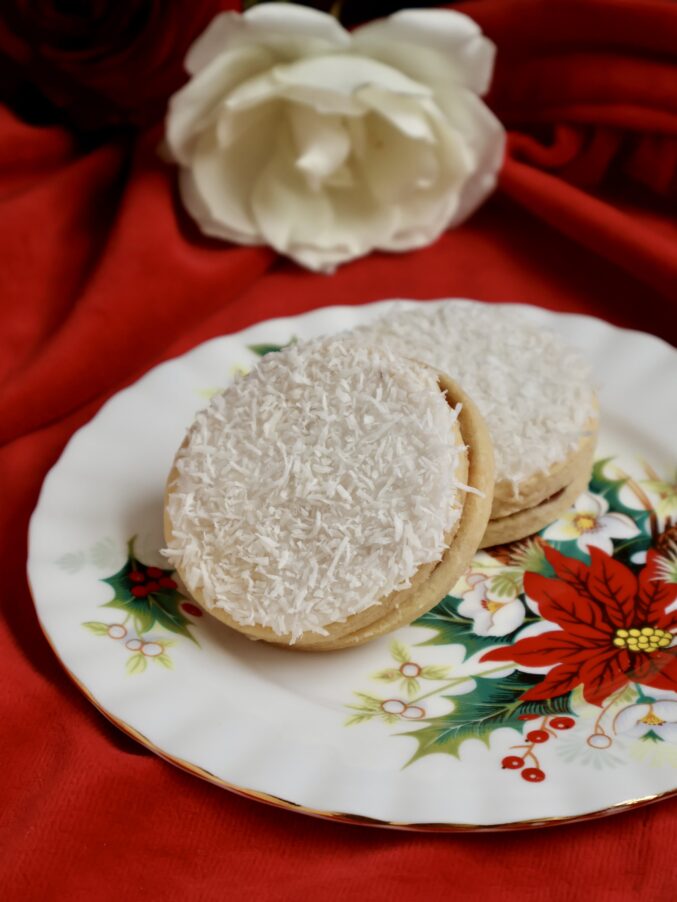
Making snow cookies, an adaptation of the snow cake my mother used to make, makes it feel more like the Christmas season to me–I mean, they look like beautiful snow-topped delights, don’t they? And if you think they just look lovely, you are so mistaken, because Snow Cookies actually taste even better than they look.
I’m sure it’s the combination of delicate, shortbread-like cookie, with the fruity, raspberry jam, the sweetness of the icing and coconut, all in one bite–its just a fabulous blend of flavors!

Here’s another wonderful thing about these cookies: they last a long time (well, I should say they “keep” for a long time; that is, if your family and friends don’t finish them immediately!)
Can I Freeze Snow Cookies?
You can make a batch of snow cookies (without adding jam and decorating) and they’ll stay fresh in a tin for weeks. Just sandwich them together and decorate a day before you’d like to eat them, or give them away. They’re perfect for Christmas and holiday cookie swaps, or to give to friends and family in festive paper boxes, adorned with lovely ribbons or bows. Or just buy some cute holiday plates and give the cookies and the plate as a gift!
As for a white Christmas, I suppose I’ll tough it out in the warm sunshine with the rest of my fellow Angelenos, yet again. We may not have snow, but we can have snow cookies!

Contest Winner
I am very excited and honored that my snow cookies were chosen as one of the LA Times Top 10 Favorite Cookies in the 2012 Bakeoff! If you are interested in my tour of the test kitchen and photo shoot, you can read about it and see some photos here. The recipe was printed in the December 15th edition of the LA Times newspaper.
*Jan. 18, 2014 – I am even more excited to add that this recipe has been chosen as the Better Recipes Editor’s Choice. My snow cookies won The Best Blogger Recipe Ever: Holiday Recipe Contest, and will be featured on The Daily Dish (online) and in print in Better Homes and Gardens magazine (April issue).
Snow Cookies
recipe by Christina Conte based on Empire Biscuits and Snow Cake Makes about 24 2″ double cookies
FULL PRINTABLE RECIPE BELOW
Ingredients
- butter
- sugar
- all-purpose flour
- raspberry jam (like Mackay’s or Bonne Maman – invest in good-quality jam, it will make your cookies taste better!)
- confectioner’s (powdered) sugar
- milk
- unsweetened coconut
Cream butter and sugar together, then add flour and mix until a dough forms. (You can chill the dough wrapped in some cling film for up to half an hour if you want to be sure your cookies don’t spread. Do this if you have a really warm kitchen.)

Place half of the dough onto to a well-floured surface, and roll out to about 1/4″ thickness. Cut with a round cookie cutter (I use a 2″ or 2 1/2″ cutter.)

Using a metal spatula or turner, lift each cookie.

Then place onto a prepared cookie sheet (I like to use a silicone sheet). Bake in a 350º F oven for 8-10 minutes.

They should not start to brown. (I turn my trays around halfway through baking to make sure they cook evenly.)
Remove the tray from the oven and set aside for a few minutes before transferring cookies onto a cooling rack. Repeat with remaining dough.
Allow to cool completely, then pair off similar shaped cookies together, placing the smoothest cookie on top.

Prepare the icing
Mix together confectioner’s sugar and milk. The icing should be the consistency of Elmer’s Glue (it will look like it too!)

Next, spread or pipe some icing on each top cookie only; do not ice all of them. I love to use a condiment style bottle to do the outline, then fill in the center. It’s really fun, and easy enough for kids to do!
Decorate the Snow Cookies

Don’t worry about getting it perfect, because once finished, they will look great!

Immediately sprinkle with coconut, and set aside with its mate. I usually let these dry overnight; they need at least 6 hours for the icing to set.

Paired cookies on the rack drying before being sandwiched together.

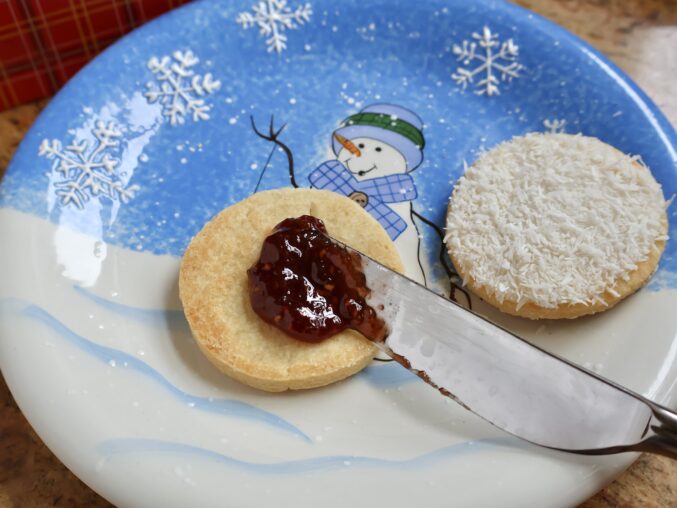
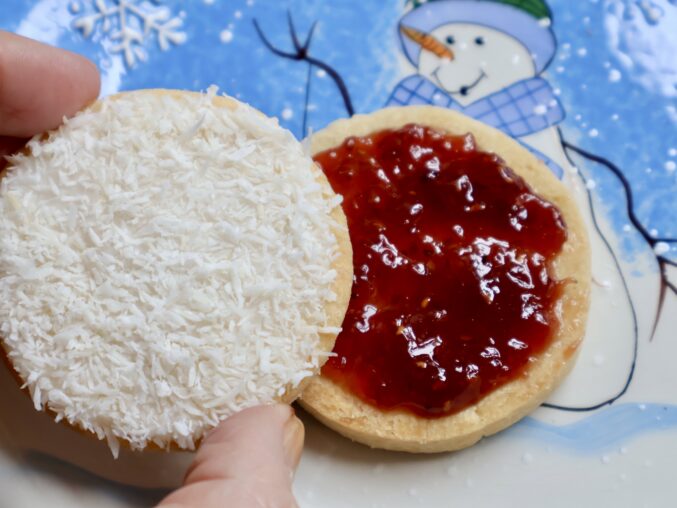
When the icing is dry, spread the bottom layer with some raspberry jam.
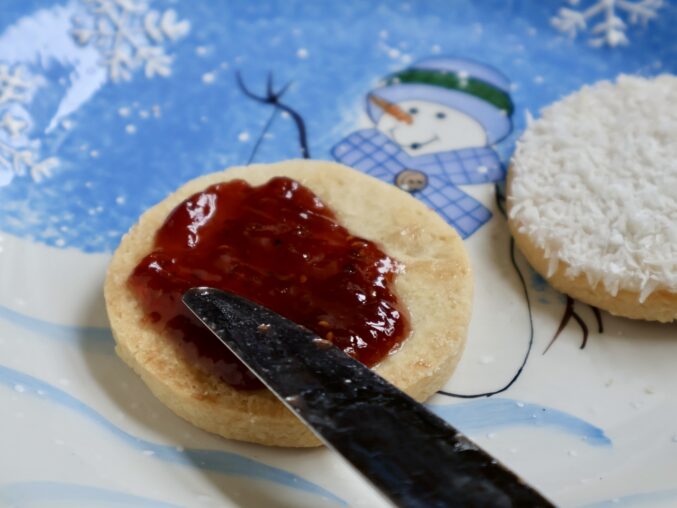
Then top with the paired, decorated top biscuit.
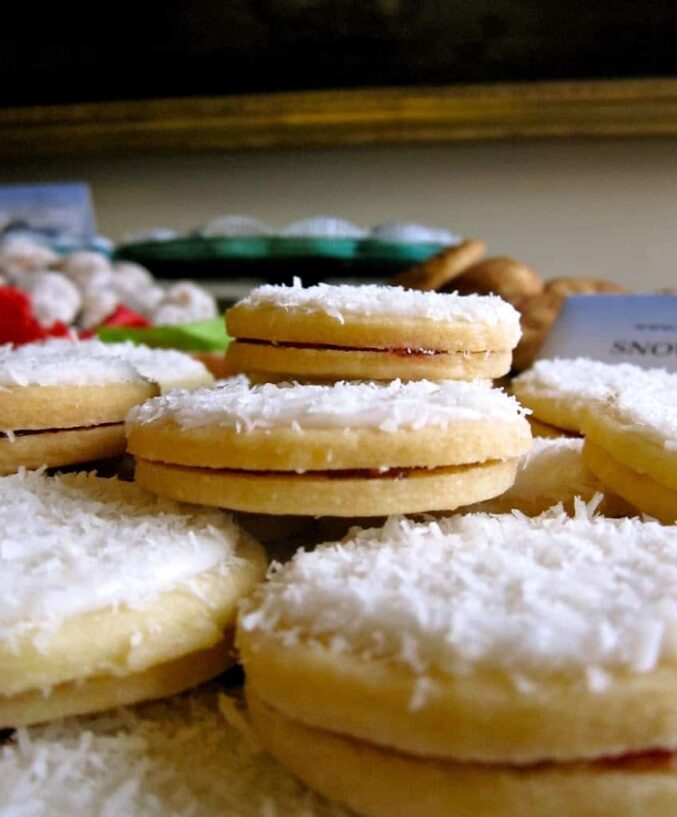
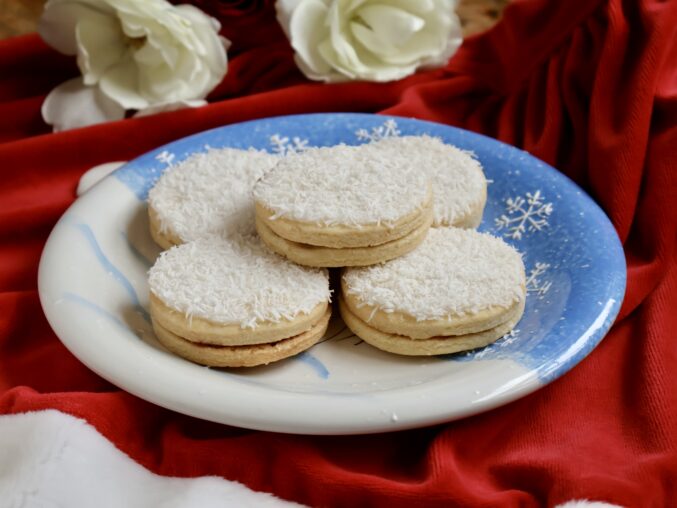
Place a few on a festive plate, or box them up for a lovely holiday gift!
This is another great foodie gift for the holidays, coconut candy!
Happy baking!

Don’t miss another recipe or travel post; sign up for my free subscription.
Snow Cookies
Ingredients
- 1 cup salted butter softened, good quality (I use Kerrygold)
- ½ cup sugar
- 2 cups all-purpose flour sifted, good quality
- 13 oz raspberry jam as needed (good quality, like Mackay's or Bonne Maman)
- 4 cups confectioner's sugar sifted
- ¼ cup milk
- ½ cup unsweetened coconut finely shredded, as needed (I like Let's Do Organic brand, which is propylene glycol free)
Instructions
Cookies:
- Cream butter and sugar together, then add flour and mix until a dough forms. (You can chill the dough wrapped in some cling film for up to half an hour if you want to be sure your cookies don't spread. Do this if you have a really warm kitchen.)
- Place half of the dough onto to a well-floured surface, and roll out to about ¼" thickness. Cut with a round cookie cutter (I use a 2" or 2 ½" cutter.)
- Using a metal spatula or turner, lift each cookie then place onto a prepared cookie sheet (I like to use a silicone sheet) and bake in a 350℉ oven for 8-10 minutes.
- They should not start to brown. (I turn my trays around halfway through baking to make sure they cook evenly.)
- Remove the tray from the oven and set aside for a few minutes before transferring cookies onto a cooling rack. Repeat with remaining dough.
- Allow to cool completely, then pair off similar shaped cookies together, placing the smoothest cookie on top.
Prepare the icing:
- Mix together confectioner’s sugar and milk; the icing should be the consistency of Elmer’s Glue (it will look like it too!) Color it into pastel colors of your choice.
- Spread or pipe some icing on each top cookie only; do not ice all of them. I love to use a condiment style bottle to do the outline, then fill in the center. Sprinkle with coconut.
- Set aside with its mate and let these dry overnight; they need at least 6 hours for the icing to set.
- When the icing is dry, sandwich the cookies together with some raspberry jam. Place a few on a festive plate, or box them up for a lovely gift!
Notes
- Invest in a good-quality butter and jam, it will make your cookies taste better!
Nutrition
Christina’s Cucina is a participant in the Amazon Services LLC Associate Program, an affiliate advertising program designed to provide a means for sites to earn advertising fees by advertising and linking to Amazon.com.
These are beautiful and completely delicious. Delicate and rich at the same time. We made them for a Christmas Cookie Competition (that is historically very competitive) last year and we won! I almost panicked when I thought I couldn’t find the recipe! Baking these will be a part of our holiday traditions for years to come!
Oh you made my day, Amber! That’s wonderful to hear that you won a cookie contest with the Snow Cookies, too! So glad that they’ll be part of your holiday baking tradition. Thanks so much for letting me know, I’m sharing your comment on Facebook! :) Merry Christmas!
They look both adorable and scrumptious! I’ll try to make them this weekend (and bring them to the office as I always do).
One quick question if I may: the 350 F, is that for a “regular” oven or a hot air one?
Hi Anne! Oooh, you’ll be the office star! 350 F is regular temp, if you use convection, then 325 F let me know how you and others enjoy them! :)
Thx! I hope so. They enjoyed this week’s gingersnaps even though the recipe said they should be chewy and the result was….well: snappy. I’ll let you know the results on the snow cookies, but I trust you and your recipe completely!
I bet you’ll love the Snow Cookies, Anne! Aren’t gingersnaps supposed to be snappy? Maybe you need a gingerbread recipe ;) Thanks for your kind words! :)
Yes, I was wondering about the “snap” part of the name too ;-)
So, I made the snow cookies.
Lesson learned: I should have listened to my gut feeling and put the dough in the fridge for a while as they “melted’ a bit when in the oven, my hands are very warm – not good for the butter
However, I found a way to shape them up nicely, took them to work and they indeed loved them! Very happy faces and mouth to mouth feedback, colleagues popping up in my office asking if I had any left. Again: thank you for always willing to share your beautiful recipes!
Ah yes, even if your kitchen is warm that will happen. I should add a note to the recipe. Glad they turned out in the end and everyone loved them, Anne! Thanks for coming back to leave a review, I appreciate it!
Love your website, and love the look of these cookies. I think my daughter and I will have a go at these for our family Chrsitmas celebrations in Linlithgow. Merry Chrsitmas all!
Thank you, Louise! Your family will love them! Merry Christmas to you, too!
I also grew up in Scotland and just love Empire biscuits!
Best bakers in the world in my opinion! Do not get me started on sticky toffee pudding !
Miss home every day ?
I have LOTS of Scottish and British recipes here, it helps the homesickness, Krystyna! Trust me, I know!