

No Knead Bread: Unbelievably Easy, Incredibly Delicious!
This No Knead Bread recipe by Jim Lahey will change your life, as it has mine. I never buy bread anymore. This recipe is nothing short of phenomenal.

Originally published November 30, 2011.
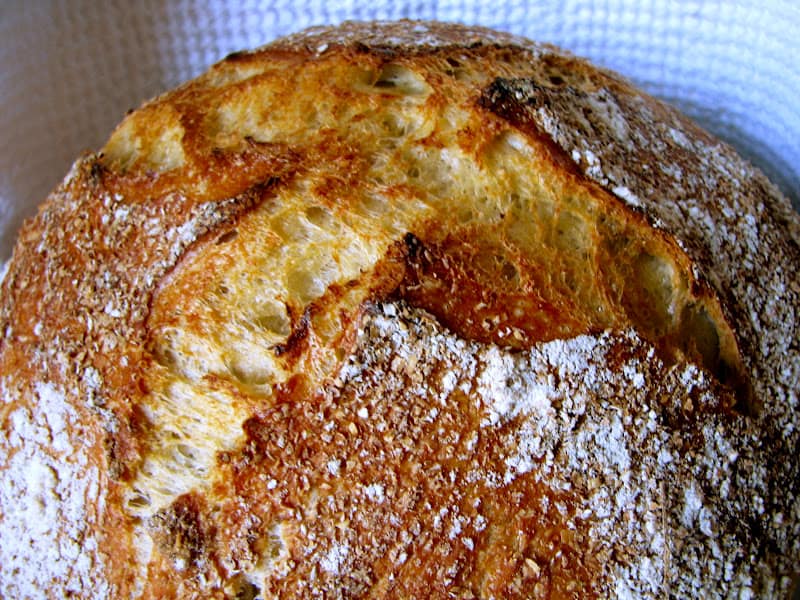
Whenever I would see loaves like this one, I never dreamt I’d ever be able to make anything so fabulous myself, nevermind that it could be so incredibly simple!
This post may contain Amazon affiliate links for your convenience, at no extra cost to you.
Well, I have made this no knead bread countless times now, and have never had a bad loaf yet! I’ve forgotten to add the salt a couple of times, but it was still fabulous.
Use this bread to make bruschetta, and to serve with cucina povera dishes like this peperonata.

I’ve shared the recipe with friends and family who have shared it, too; it’s just an amazing discovery. You just won’t believe how easy this bread is to make.

First of all, you’ll need a 5 quart cast iron Dutch oven pot, which you can order on Amazon, delivered to your doorstep. I only use my pot for baking bread–it’s a like mini, inexpensive gourmet oven!

Want another great recipe using yeast? It’s the most popular recipe on my site,
PERFECT YEAST DOUGHNUTS!

Jim Lahey’s video for his no knead bread recipe is great, but I’ve added some things he’s left out such as letting the bread rise before baking (a must.)
Try this fantastic no knead pizza dough recipe, too!

I’ve also listed the ingredients at 50% more than his, so you get a larger loaf.

Note: I have attempted to make this recipe during hot summer days and it simply does not work. I have not yet tried to have it rise in the fridge because, to be honest, if it’s that hot, I just don’t want to turn my oven on.

No Knead Bread Recipe
adapted from Mark Bittman’s original recipe makes one large loaf
FULL PRINTABLE RECIPE BELOW
special equipment: 5 quart cast iron dutch oven
Before you watch the video, I’ll give you my tips:
The ingredients above make a loaf 50% larger than Jim Lahey’s recipe. This is what the dough will look like after 12-18 hours: a cross between batter & dough.

Use a spatula instead of your hand–much easier, and less messy.

After the 12-18 hrs. just work the dough into a loaf shape right in the bowl. Here’s a video of how I shape the dough.
Click Here for Jim Lahey’s No Knead Bread Video
Drop the dough onto the cloth–again, less mess; then sprinkle with more flour and oat/wheat bran.

Tips for Best Results
The video doesn’t show this, but let it rise for about two hours in the towel or until doubled in size, or your bread will not turn out properly; do not skip this step. Once it’s in the pot, I like to make a little snip with scissors, or a bread lame slice across the top. See complete, printable recipe below.
Preheat the oven AND THE POT for 20 minutes (longer than when it just comes to temperature). I bake my no knead bread on convection, 495 °F (260°C) for 30 mins., then lower to 465°F (240°C), REMOVE THE LID, and bake for 8-11 minutes longer, depending on your preference of crustiness.
If you don’t have a convection oven, 500°F (260°C) or as hot as your oven will go, then lower to about 475°F (245°C); adjust according to your own oven.
Carefully, remove the loaf from the pot immediately and place on a cooling rack.
MAKE SURE TO LET THE LOAF COOL AT LEAST 3 HOURS BEFORE SLICING!

Big brothers have also been known to finish their little sister’s entire loaf before anyone else
could get a slice! Proceed at your own risk.
Click here to watch Jim Lahey’s No Knead Bread Video

No Knead Bread: Unbelievably Easy, Incredibly Delicious!
Special Equipment
- 1 five quart cast iron dutch oven
Ingredients
- 4 cups all-purpose flour (good quality, like King Arthur)
- ½ cups whole wheat (or omit the wheat and replace it with ½ cup / 70 gram more all purpose flour)
- 18 oz water
- 2 ½ tsp Maldon salt (salt varies in saltiness, so taste your salt)
- ¼ tsp dried yeast (or 3 g fresh yeast, preferably not instant or quick-rise)
- 1 Tbsp wheat germ (optional, or crushed flaxseed)
Instructions
- (See my tips in the notes section below): Mix all the ingredients together in a large bowl until everything comes together. This will only take a few minutes, maximum.
- Cover with a plate or plastic wrap and let rise for 12 to 18 hours or until it's risen (about 4 times in mass and is soft and bubbly.)
- Using a spatula, mix down the dough/batter to remove all the air from it and form into a nice round in the bowl.
- Put a tea towel on the countertop and sprinkle liberally with flour and some other grain like wheat germ or oat bran to keep the dough from sticking to the cloth. Don't be shy or the loaf will stick.
- Using the spatula, dump the dough onto the floured cloth, put the edges of the cloth over the top and allow to rise for 2 hours.
Baking:
- Preheat the oven AND THE POT for 20 minutes (longer than when it just comes to temperature). I bake my no knead bread on convection, 495 °F (260°C) for 30 mins., then lower to 465°F (240°C),
- When the oven is at the 495 temperature for about 10 minutes, carefully remove the pot from the oven and put it on the counter near the dough. Lift both sides of the tea towel and dump the loaf into the hot pan. Place the lid onto the pot and put into the oven and bake for 30 minutes. After half an hour, REMOVE THE LID, and bake for 8-11 minutes longer, depending on your preference of color and crustiness.)
- If you don't have a convection oven: 500°F (260°C) or as hot as your oven will go, then lower to about 475°F (245°C); adjust according to your own oven.
- Carefully, remove the pot from the oven, and the loaf from the pot immediately, and place on a cooling rack.
- Cool for at least 3 hours before slicing.
Notes
- PLEASE NOTE: THIS RECIPE REQUIRES THAT YOU PLAN AHEAD! I usually mix my dough in the evening (9 pm or later) then when it is ready in the morning or afternoon, I put it on the cloth to rise for 2 hours and bake it. If you cannot be home for 3 hours during the time that the bread is risen, plan to make it at a different time.
- The ingredients above make a loaf 50% larger than Jim Lahey's recipe. It will be a cross between batter & dough.
- Use a spatula instead of your hand--much easier, and less messy.
- After the 12-18 hrs. just work the dough into a loaf shape right in the bowl.
- Drop the dough onto the cloth--again, less mess; then sprinkle with more flour and oat/wheat bran.
- MAKE SURE TO LET THE LOAF COOL AT LEAST 3 HOURS BEFORE SLICING!
Nutrition
Let me know how yours turns out!
Don’t miss another post! Sign up for my free recipe & travel subscription at the top of the page.
♦
Christina’s Cucina is a participant in the Amazon Services LLC Associates Program, an affiliate advertising program designed to provide a means for sites to earn advertising fees by advertising and linking to Amazon.com.
I have made this bread several times and it’s really great. Such an easy recipe and very little to go wrong.
Thank you for commenting to let me know–I appreciate it and so do other readers. :)
I have made a variation on this recipe but don’t put it in a dutch oven. I divide it in half and make two baguette-style loaves. This is a great recipe!
I bought the fabric for making proper baguettes, but have yet to try it! I’m a little intimidated! :)
Hi Christina, your bread loooks amazing! Please could you give me the Centigrade temperatures, and also can one use instant yeast, and if so what quantity is neeeded? Many thanks. Ingrid.
Hi Ingrid! Yes, I will add the C temperatures, no problem at all, however, I would not recommend using instant yeast. Instant yeast is a fast-rise version which this bread is not suited for, due to the extremely slow rise. If you want to give it a go, you could always try, but I wouldn’t recommend it as it may not turn out. Let me know what you decide and good luck! CC
This looks really easy; I’m looking for new pots and pans so when I place my order, I’ll have to include this – do you have an affiliate link for it?
It’s SOOO easy, Lauren! Yes, I’ve added an affiliate link now, thanks!
Christina, I know this recipe is absolutely amazing!
People, if you don’t have a cast iron pot, go buy one(we got our inexpensive version on Amazon-I think it was $30-$40). Seriously! You will not regret it!
Easypeasy, and SO delicious! Gotta love me some Christina’s Cucina!
Thank you, Janis! I love seeing the photos of your beautiful loaves! CC