

Afternoon Tea Scones
Afternoon tea scones are a quintessential part of British culture. Learn how to make the best scones using my tried and tested scone recipe, and how to serve them with a lovely cup of proper British tea.
Originally published May 1, 2012
As I was born in Scotland, scones were part of my life. I grew up with scones, and I LOVE scones! I want to start by saying, this is a proper recipe for British afternoon tea scones, if that’s what you’re looking for.

This post contains Amazon affiliate links for your convenience, at no additional cost to you.

If you don’t want to hear what I have to say about scones, simply scroll to the bottom for the printable recipe. However, I will tell you, you’ll miss all of my tips.

What are Scones?
Scones are a baked treat which is made from a dough (not a batter), lightly sweetened and served with butter, and/or jam and cream. Savory scones are also delightful when served with soup, such as cheese scones or parsnip scones. Afternoon tea scones originated in Scotland, but are now known the world over.
Scotland’s bakeries and tearooms have to be among the best in the world. The sweets and savory treats being created in these places, are often beyond description, so my standards are high. I’m also going back to the UK enough to keep getting the “real thing” which keeps my standards high!
The Afternoon Tea Experience
We were just in the UK last July, and were lucky enough to have so many wonderful scones! Afternoon tea scones can be served very casually.


My wonderful Aunt Rosa made us her homemade afternoon tea scones the day we left to go to Scotland. Then, we found the loveliest little tearoom called the Sweetapples Teashop, in Marshfield, England.

I was so excited to have tea and scones at Cafe Loco in Oxford, an Alice in Wonderland themed tea room in a 500 year old building!

While in London, I bought a scone from Harrod’s for only 65p (about $1) for my daughter, which she ate the next morning and it was still incredible the next day! Yes, I’m asking myself the same question you probably are: why did I only buy one?!

However, afternoon tea scones can also be served quite a bit more formally, as they do at Down Hall in Essex.

As you can see, good afternoon tea scones come in all shapes and sizes, but are most usually round in shape in the UK.
Traditionally, they are plain or have raisins, or currants. They must be light and well-risen to be considered really good scones.

Many times when my mother and I attempted to bake something British here in the US, it wouldn’t turn out the same. Of course, the flour is different, so are the milk and eggs and all the other ingredients, so it’s not surprising. However, we’ve always kept trying to replicate certain things we loved from when we lived in Scotland.

Scones are one of the bakery items we baked a lot. I must have tried a dozen or more different recipes until I created this one myself. Now, it’s the only scone recipe I use.
In my quest to find the best scone recipe, I learned many things which result in lighter, and more perfect scones.

How to Make the Best Scones
(Tips for Best Scones)
- (My) GOLDEN RULE OF COOKING-Use QUALITY ingredients!
- Use real butter, no substitutes
- Buttermilk helps the scones to rise more than plain milk (no buttermilk? use milk + lemon juice)
- Do not overwork the dough, or the scones won’t be light
- Use very sharp cutters to cut out the scones, this also helps them to rise
- Place them relatively close on the tray as they will rise more than if they are far apart
And no, American biscuits and scones are not the same thing. They look similar, but that’s all. They are made differently using different ingredients.

How to Freeze Scones
I love to make a double batch of these and bake half, then freeze the other half (unbaked.) It’s very easy if you place them on a well-floured tray and put them in the freezer, uncovered. Leave them for about two hours, until frozen, then remove them from the tray and place in a freezer bag, and return to the freezer.
This way you can bake one, two or as many as you want, whenever you want warm, freshly baked afternoon tea scones, with no mess to clean up!

You can also bake the scones and freeze them as soon as they have cooled completely. However, the first method is my favorite way to freeze them as you will end up always eating a freshly baked scone.
Afternoon tea scones are perfect for Valentine’s Day, Mother’s Day, birthdays (including having a tea party for children), and of course, afternoon tea! Here’s how to make a perfect pot of British tea.
In case you didn’t know, there are lots of different types of scones. I don’t mean currant scones, or orange cranberry scones. You could make girdle scones, or potato scones or soda scones, for example.

Printable recipe is at the bottom of the post.

Afternoon Tea Scones Recipe
Prep time: 15 mins Baking time: 16 min
Adapted from an old Scottish recipe Makes about 8 medium sized scones
FULL PRINTABLE RECIPE BELOW
Ingredients
- flour
- salt
- sugar
- baking powder
- buttermilk
- egg
- butter
(To Serve)
- cream
- jam
NOTE: for best results I highly recommend using a scale for precise measurements
Special equipment: sharp cutters like these or these
Directions
Make the Dough
Heat oven to 400ºF (205ºC)
In a bowl, place the dry ingredients. Mix lightly to combine.

In a measuring jug, put the buttermilk (including the 1 Tbsp.) Beat the egg in a small bowl, then pour into the buttermilk and mix well.

Place the butter in the center of the dry ingredients and cut with a knife into about 16 pieces. Next, take another knife, pastry blender or your hands and cut/mix the butter into the flour until it resembles coarse crumbs.

Make a well in the center of the dry ingredients and pour in the egg and buttermilk, *reserving one tablespoon of liquid in the jug.

Mix gently with a wooden spoon until a dough forms, just about 10 seconds. If you are adding dried fruit or any additions, add it now.

Roll and cut the dough.
Place dough onto a clean, well-floured surface. Gently, form into a ball, then pat out with your hands to approximately 3/4″ in thickness. Fold the dough over once, then roll or flatten to approximately 3/4″ in thickness. Do not knead the dough or it will make the scones tough.

With sharp cutters, cut out scones.

Use whatever size you prefer; larger or smaller.

Prepare to Bake the Scones
Place on silicone baking mat or parchment lined baking tray. Gently knead scraps together and repeat until dough is finished, (make a “runt” with the remaining little bit of dough). Don’t worry about cracks and imperfections in your scones.

Using a pastry brush, brush the tops of the scones with the remaining egg/buttermilk mixture.

Bake the Scones
Place in middle of preheated oven for about 9 minutes, then turn tray and continue to bake for another 9 minutes or until the afternoon tea scones look golden brown on top.

Meanwhile, cleanup is super easy if you have one of these little pastry scrapers!

Remove from oven, and tray, then place in a towel lined basket, or cooling rack if you wish to serve them on a plate.

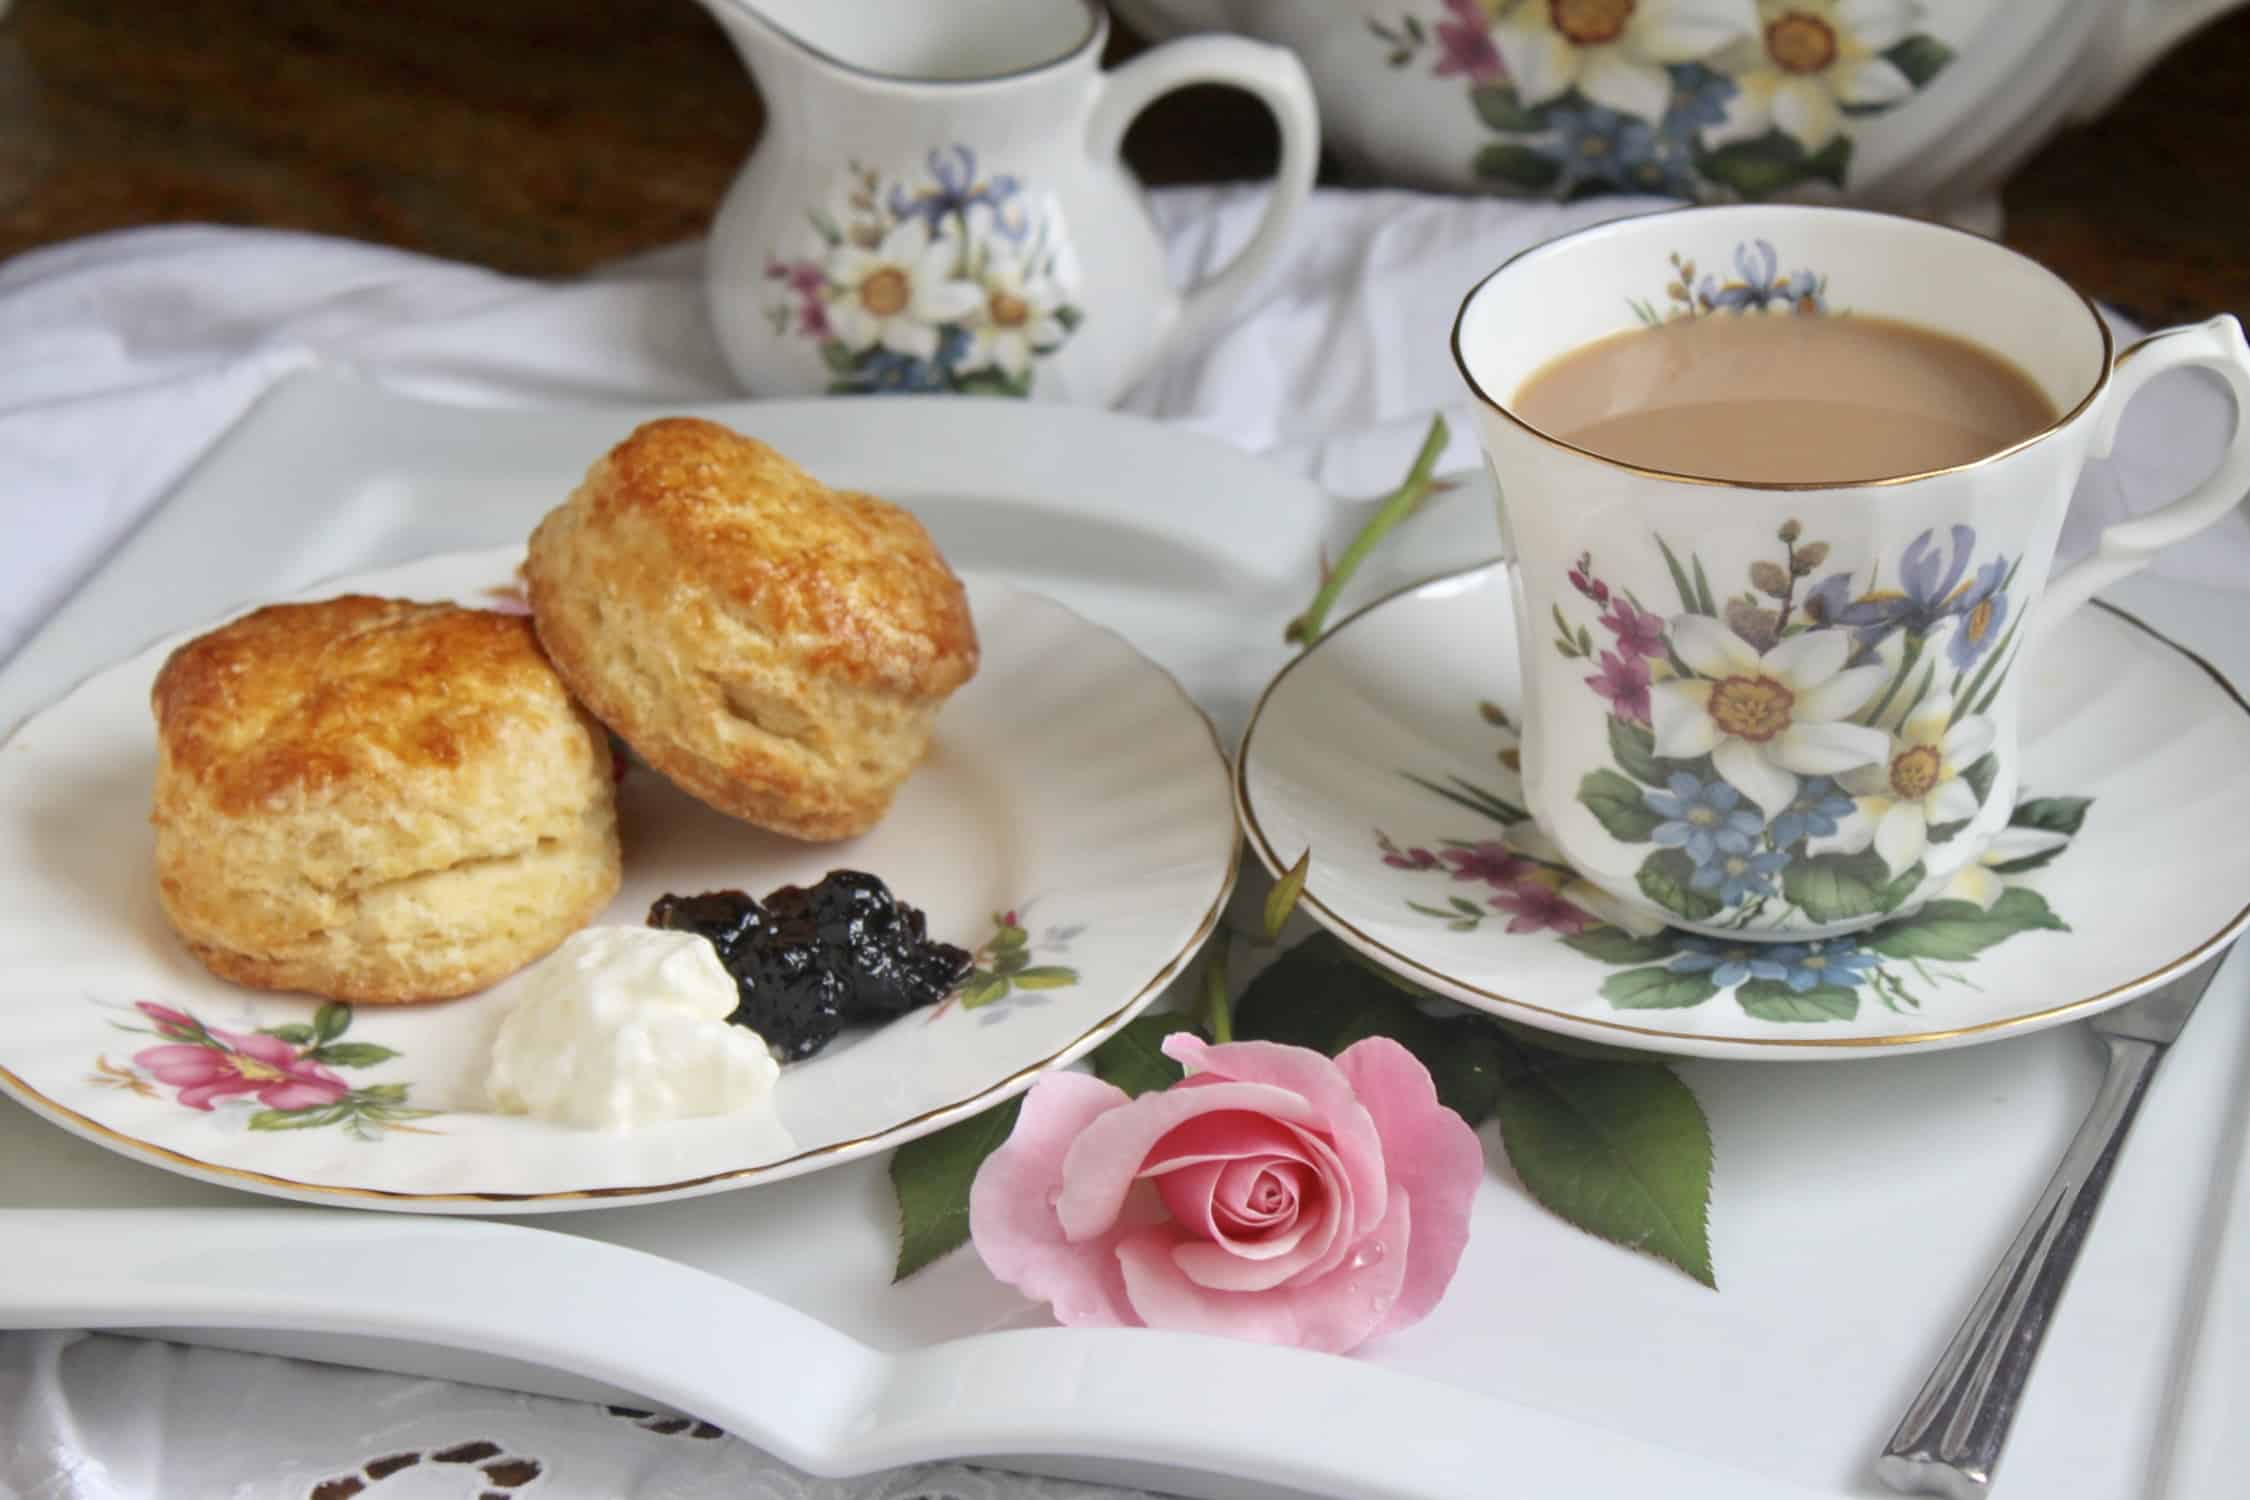
How to Serve Afternoon Tea Scones

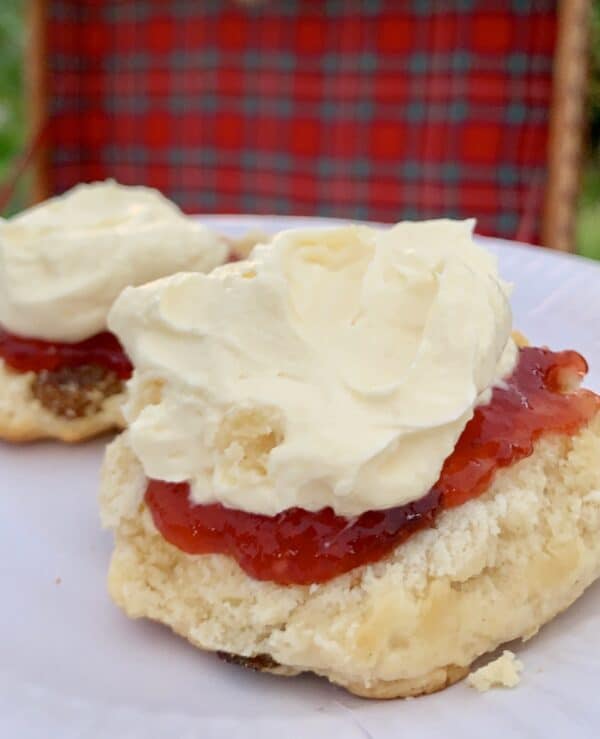
There are several ways to serve scones, but the most traditional is with raspberry jam and clotted cream or Double Devon Cream; and since the latter two are hard to come by in the US, freshly whipped cream (no sugar added). Please do me a huge favor and do not ever serve these with any non-dairy whipped topping!

If using fresh whipping cream, whip until thick (an organic cream with no added ingredients will taste best).

Use homemade or good quality jam, such as this strawberry jam from Scotland. Strawberry jam is perfectly acceptable, as is raspberry jam, or blackcurrant jam, etc.

Next, make a pot of tea.
Before I write this next step, I must say that England has one of the most heated debates regarding whether one should put jam first, then cream or vice versa, when eating a scone.
Can I Freeze Scones?
Absolutely, scones freeze exceptionally well. You can freeze them before or after baking and will have a “just baked” experience either way. See the notes in the printable recipe card for detailed instructions.
The Jam First or Cream First Debate.
If you want to read the arguments for and against each position, you are more than welcome. While 99% of the time, I put the jam first, to me, it depends on the type of cream one is using. A thick clotted cream can easily go on first, but if you’re using whipped cream, then that just has to go on top of the jam, otherwise, there will be a big mess! Also, Queen Elizabeth II says jam first, so who’s going to argue with the Queen!?
How to Pronounce the Word “Scone”: it depends, but I say it the correct way!
There is another debate regarding scones, which is over the pronunciation of the actual word. Coming from Scotland, I pronounce “scone” as if it rhymes with “gone.” Parts of England also pronounce it this way, but then other parts say, “skown” (rhyming with own).
The whole debate is actually quite interesting, however, while I may be biased, scones were invented in Scotland, so I say our way is the correct pronunciation, if there has to be one. The deciding factor may go to the Queen: she says “scone” as in “gone”! Yea!
Tea’s ready!

Milk only; never put cream in tea.

And we are ready to serve the afternoon tea scones.
Want to make it more than just tea and scones, or a cream tea as it’s called? Add some dainty finger sandwiches for a more filling afternoon tea.

For a full afternoon tea experience, add some small pastries such as strawberry tarts, and these passion fruit and lemon meringue tartlets, petit fours, and maybe some individual desserts like these mini lemon raspberry trifles.

Oh my, afternoon tea is just so civilized, and delicious!

If you’re being more formal, just take a little jam and cream (from your plate, never directly from the serving bowls) and put it on a part of a scone. Take a bite and repeat.

Enjoy the afternoon tea scones!

And here’s how to make a “proper” cup of British tea!
Get the latest posts in your inbox for delicious recipes and travel inspiration at the top of this page.

Afternoon Tea Scones
Ingredients
- 2 cups all-purpose flour
- 2 tsp baking powder
- 2 Tbsp sugar
- ⅛ tsp salt
- ⅓ cup unsalted butter (cold)
- 1 egg room temperature
- 4 oz buttermilk (plus 1 Tbsp more)
- ¼ cup raisins or currants (optional)
- 1 jar jam to serve
- 1 cup cream to serve
Instructions
- Heat oven to 400ºF (205ºC)
- In a bowl, place the dry ingredients. Mix lightly to combine. Set aside.
- In a measuring jug, put the buttermilk (including the 1 tablespoonful of buttermilk.) Beat the egg in a small bowl, then pour into the buttermilk. Stir to combine.
- Place the butter in the center of the dry ingredients and cut with a knife into about 16 pieces. Next, take another knife, or pastry blender and cut/mix the butter into the flour until resembles coarse crumbs, finishing off the pastry using your hands to rub the butter into the flour. It's ready once the pieces have become quite small.
- Make a well in the center of the dry ingredients and pour in the egg and buttermilk, (reserving one tablespoonful of liquid in the jug). Don't forget this last step as it will save you using a second egg.
- Mix gently with a wooden spoon until a dough forms, just about 10 seconds. (If you are adding dried fruit or any additions, add it now.)
- Place dough onto a clean, well-floured surface. Form into a ball, then pat out to approximately 3/4″ in thickness. Do not knead the dough or it will make the scones tough.
- With sharp cutters, cut out scones and place on silicone baking mat or parchment lined baking tray. Gently knead scraps together and repeat until dough is finished, (make a “runt” with the remaining little bit of dough).
- Using a pastry brush, brush the tops of the scones with the remaining tablespoonful of egg/buttermilk mixture.
- Place in middle of preheated oven for about 9 minutes, then turn tray 180º and continue to bake for another 9 minutes or until scones look golden brown on top.
- Remove from oven, and place in a towel lined basket, or on a cooling rack if you wish to serve them on a plate. Serve with butter, or real cream and jam.
Notes
- TO FREEZE: A) bake and don't brown completely, cool on rack then freeze scones individually until hard, then place in a freezer bag. B) before baking, freeze completely, then place in freezer bag.
- TO HEAT FROM FROZEN: A) Remove as needed and reheat/finish browning in air fryer or oven (350ºF/175ºC) for about 10 minutes. B) Remove as needed, leave at room temperature for about 30 minutes, then bake as directed in the recipe.
- Nutrition facts include raisins, jam, and cream
- Be sure to follow my tips for best results.
- Omit the salt if you use salted butter
Nutrition
Christina’s Cucina is a participant in the Amazon Services LLC Associates Program, an affiliate advertising program designed to provide a means for sites to earn advertising fees by advertising and linking to Amazon.com
Can you help with how I can tell if the scones are baked throughout? I know you said 18 minutes in total, but everyone’s oven is different. To be on the safe side, I always check by cutting one in half, in case they’re under baked and gummy.
Lastly, I only have plain 0% Greek yogurt and vinegar, but no fresh lemons to make buttermilk.
Thanks
Hi Ann, you’re correct about the oven situation being different for everyone. First of all, they should be a little golden brown on top. Second, one big trick I’ve learned is to use my nose! When you start to smell the scones (or cake or whatever you’re baking) then it’s getting close to being ready. Third, I’d check the bottom to see that they are brown also, however, after 18 minutes, if your scones are raw and gummy inside, I think you need to invest in a oven thermometer or get your oven checked as that’s simply a long time to have them be raw. And lastly, your method of cutting one open is most assuredly the best way (use the runt). :)
You don’t have any milk at all? I think the greek yogurt in place of the milk will change the consistency of the dough and ultimately the outcome of the scones. Maybe try to water down the yogurt and a dash of vinegar, but I can’t tell you how they’ll turn out this way. Good luck!
I feel like I’m blind but I don’t see where you have posted what temperature to set the oven, it just says “in a preheated oven”
Hi Shelley, no, you’re not blind! The temperature is listed on the recipe in the main part of the post, but somehow it didn’t get transferred to the printable recipe! So sorry. I’ve fixed it now. Enjoy the scones! Christina
Oh good! Thank you so much! I am looking forward to trying these.
You’ll love them, Shelley! Let me know how they turn out!
Thank you for this lovely recipe and post. Ever since my first cream tea on a visit to England 30 years ago, I have tried to replicate a perfect scone and clotted cream to match my memory. I remember that all of the dairy products were incredible, which is a big part of the deliciousness of cream tea: beautiful butter in the scone, a dash of high quality milk in the tea and luscious clotted cream on the scone. During my early experiments, it was hard to find really good butter or milk and impossible to find clotted cream. Thankfully these products are now more readily available in California AND I found YOUR recipe. Your scones are perfect and I love your suggestion to set aside a spoon of the egg/milk to glaze the scones, because it gave a lovely sheen to the finished scone. Every other scone has been too sweet or too rich or not light enough. These were perfect. I paired them with a perfect cup of tea, som Devon cream (care of Amazon) and homemade plum jam from my mum! Next I plan to make clotted cream at home from some local cream from grass fed cows because it’s so expensive by mail and often doesn’t arrive in fresh pristine condition. This recipe goes into the permanent file!!
Your comment has made my day, Christine! Love to be able to help others with recipes they long for (because I know exactly what that feels like)! So happy you found it and sounds like you’ve got the perfect accompaniments with your mum’s jam and Devon cream! Wish I could join you! Thank you so much, and hope you enjoy more of my recipes. CC
Hi Christina,
Thanks for sharing this recipe!! It is wonderful!
I love the subtle salty taste with pinch of salt added! They are soft, buttery and flaky as well.
*On a side note, I have also substituted 1/4 cup of all-purpose flour for low protein flour and added 1 tsp of vanilla essence.
Happy to hear it, Ee! They are lovely scones, enjoy!
Hello Christina, I have never commented on a recipe from a website before but I thought this recipe deserved a quick note of recognition. I’ve made your scones about a dozen times now, they are an absolute family favorite and my go-to when hosting a tea. I’m from the US and lived in Australia for a few years where their scones seem very similar to these and I couldn’t get enough of them. So when we moved back I went in search of a solid scone recipe and found yours. Thank you for posting this amazing recipe and with such detailed pictures.
Quick question, have you ever used almond milk for the buttermilk? Half of my family has a dairy allergy and I know they would love to try these delicious scones.
Oh you are so sweet, Michelle! Thank you so much for taking time to write this comment, I really appreciate it! So glad you and your family enjoy them.
To answer your question about the almond milk, I have not tried it because my daughter is allergic to tree nuts. Although she’s not allergic to almonds (they are not tree nuts) I’m afraid of contamination with other nuts, so we just avoid them. I would say give it a go one time. I think they would turn out as there is still the egg and baking powder to help them rise, but the buttermilk just helps them to rise even more. Let me know if you try and thanks again!! Happy scone making! CC
Just a little comment…. I have my Great Grandmother’s handwritten scone recipe (Scottish) dated 1909. She notes to reserve two tbsp of liquid to glaze the scones before baking. Another blogger didn’t plagiarize you. It was being done more than 99 years ago.
I didn’t mean to insinuate that I am the first person to EVER do this. I have never seen it in any scone recipe that I’ve personally seen and I’ve seen a lot. I can almost guarantee this woman did copy this from my site because it’s not just this that she’s copied. :(
Love your site !!! Want to pass along a tip I read concerning using cutters for biscuits. It said ” when cutting out your dough, just cut straight down & then up”. By NOT twisting the cutter in this process, it will make the biscuit rise higher. Apparently not sealing the cut edge. Have you heard of this? Would appreciate your comment. Thanks, Nancy
Yes! It’s true, Nancy and I guess I never thought to put that in, but I can edit my recipe to add this. The dough is easy enough to cut just going down, but I suppose if people don’t know they might twist in the process. Thanks for your comment! :)
My husband is from the UK and we met in the US when I discovered your website. It has been a blessing with all your recipes making it easy for me to make some of his favorites like Scottish eggs etc. We have recently moved to the UK and are currently buying a house up in Scotland near the Dundee area so I have referred to your recipes a lot. My mother-in-law is very jealous and tries to tell me you don’t know what you are talking about because you live in the US now despite telling her of your acknowledgements etc so I continue to cook using a lot of your recipes and tell her nope its not from “Christina” until afterwards when she says how delicious they are. Thank you so much for helping me to bring some Scottish cooking among my family again we ALL love your recipes and you make it so easy and fun to make!!!
Wendy, I can’t thank you enough for your note! You’ve made my day (and I’m in Como, so that’s saying something)! Love that you love my recipes despite your MIL 😂 Thank you!