Perfect Yeast Doughnuts (Donut Recipe with 3 Fillings)
Perfect yeast doughnuts are easy to make at home if you have the right recipe. You now have that recipe in your hands (or on your desk). What are you waiting for?
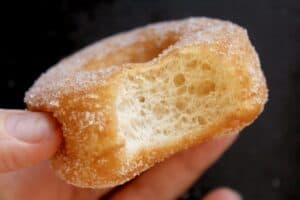
Who can resist perfect, soft and fluffy doughnuts?
As an Amazon Associate I earn from qualifying purchases.

Especially if it is a fresh, fluffy, homemade, perfect yeast doughnut filled with raspberry jam and fresh cream? Not me!
If you think that yeast doughnuts are difficult to make, think again, especially if you own a stand mixer or bread machine. You can make ring doughnuts, filled doughnuts, or doughnut holes. I just want you to know that one batch of these beauties will disappear within seconds. However, don’t take my word for it, read the comments!
You may also enjoy my VEGAN donuts recipe! My dad highly approves, and that’s saying something!
Incidentally, I’ve linked to the bread machine I have, but any bread machine with good ratings will work (like the one I linked to above), and they are much less expensive.
I also have an Italian Christmas doughnut recipe: frittelle! I just LOVE donuts!

Frequently Asked Questions are Under the
Printable Recipe Below
✧
How to Make Yeast Doughnuts
adapted from a recipe in The Bread and Bread Machine Bible
makes about 16 ring doughnuts
SEE PRINTABLE RECIPE BELOW FOR MORE EXPLICIT DIRECTIONS FOR USING A STAND MIXER OR BY HAND
The measurements are critical in this recipe, so a scale is necessary. (This is why there are no cup measurements-please do not ask for them.)
Too many readers were not having success with this solid, tested recipe, and the only reason I can think of is the difference between using cups, versus a scale (volume vs weight). The ONLY way to obtain the correct amount of flour and other ingredients is by weighing them.
FULL PRINTABLE RECIPE BELOW
Ingredients
- water
- buttermilk
- egg
- butter
- all-purpose or bread flour
- sugar
- salt
- regular or quick-rise yeast
- oil for frying
- (sugar for coating the doughnuts)
- (jam, chocolate hazelnut spread, and or whipped cream for filling, if desired)
Special equipment:
- parchment paper, cut into about 4″ squares (smaller pieces for doughnut holes)
- large pot, deep fryer or wok
- a sharp doughnut cutter (a reader asked what I recommend, and I like this one as there is no guessing where the center of the doughnut is–perfect doughnuts every time).
- candy/oil thermometer, not necessary, but very helpful if you’re not a deep-frying pro
- skimmer
Directions to Make the Doughnut Dough
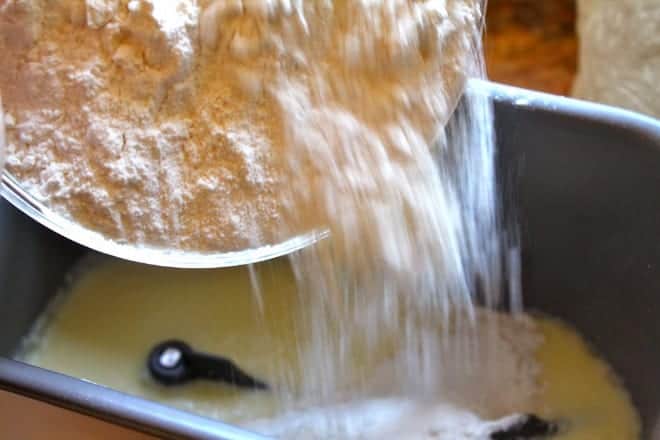
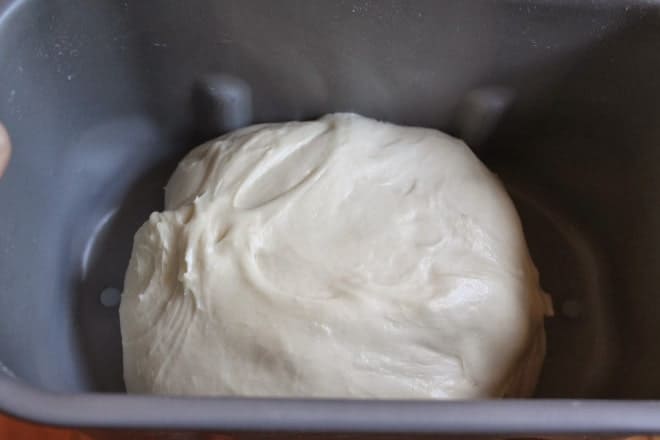
Place the water, buttermilk, beaten egg and melted butter in the bread machine pan or stand mixer bowl, then add the dry ingredients, except for the yeast.
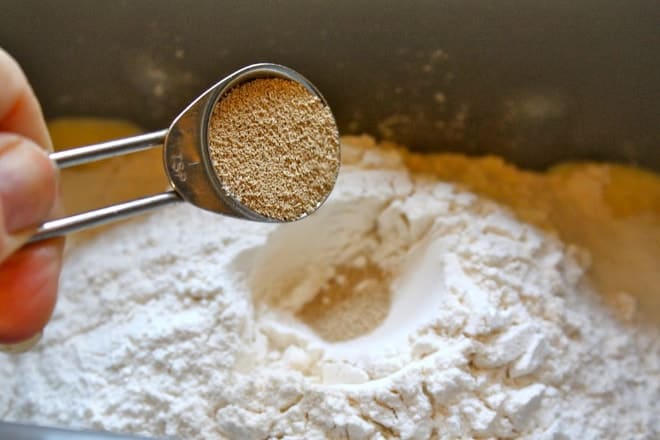
Make a small indentation in the dry ingredients, then add the yeast.
Set the bread machine on the ‘dough’ setting.
If using a stand mixer (see directions in printable recipe below, as steps with the yeast are different), run it with the dough hook, until a soft dough is formed, then cover and set aside until at least doubled in size.
I do not specify a time on the dough rising because there are too many factors that will determine the length of time. Which yeast was used (regular or quick rise), if the yeast was fresh or old (older yeast doesn’t work as well, or sometimes not at all), and the temperature of your kitchen. In my kitchen, this process usually takes 1 to 2 hours.
Roll out the Dough and cut
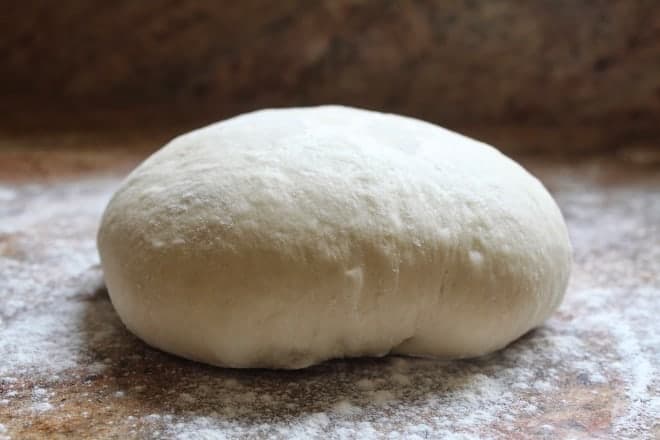
Once the dough has risen, place it on a floured surface and knead lightly. Divide it in half, keeping half the dough covered, so it doesn’t form a skin.
With a rolling pin, roll out half of the dough to about 1/2″ thickness. (Do not rest the dough.)
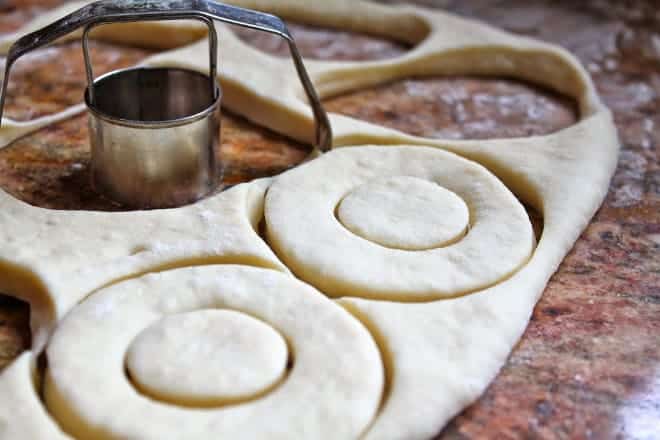
Cut with a round, sharp doughnut cutter (about 3″ diameter). Or else use a sharp cookie cutter, then make the holes with a smaller cookie cutter (about 1″ diameter), saving the holes. This is an older photo, I recommend this cutter.
Let the cut Doughnuts Rise
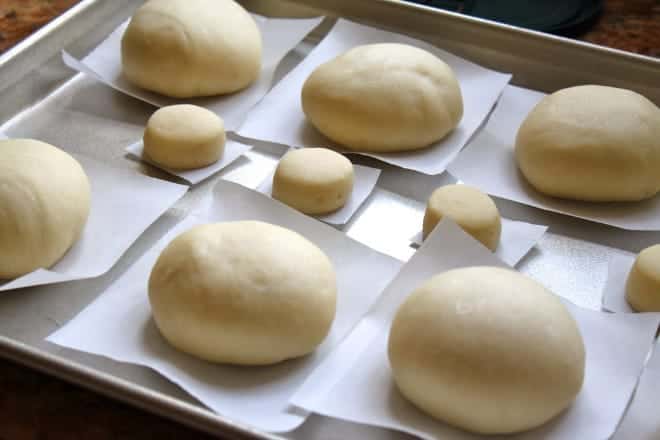
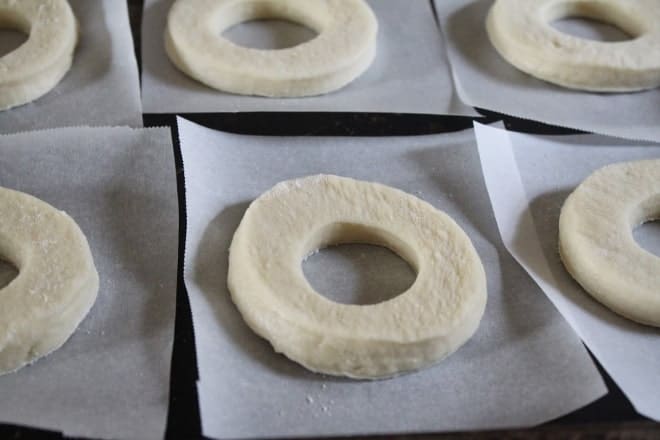
Place each doughnut on a piece of parchment paper, then place on a cookie sheet. Put the tray in the oven (turn it on for 1 minute, SET A TIMER, then turn the oven off again, just to make it barely warm). The oven warming step should not be necessary in the summer unless your a/c is very cool.
Next, boil some water and pour it into a measuring jug or bowl. Place the jug of water in the oven with the tray of doughnuts (this will create steam will keep a skin from forming).
With the remaining dough, divide into quarters, then divide each piece in half to make 8 equal amounts. If you are perfectionistic, you can weigh each piece on a kitchen scale–not that I’d ever do any such thing! ;)
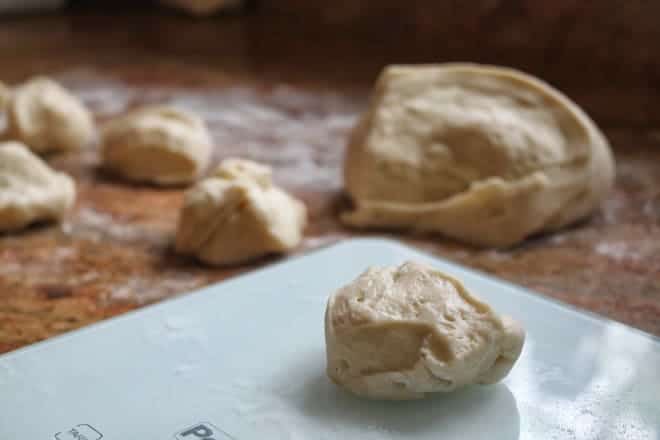
Roll each piece of dough into a smooth ball on a lightly floured surface, and place on parchment or waxed paper pieces and place on a cookie sheet; place in the oven with the other doughnuts and holes to rise until doubled in size.
(Please don’t focus on the time, just go by how they look, but usually anywhere from 1/2 hr to 1 hour is normal for this second rise.) I don’t like to waste plastic wrap, so use the hot water method again.
Fry the Homemade Yeast Doughnuts
Heat the oil to about 350ºF (180º). If you don’t have a thermometer, test the oil with a doughnut hole. If it doesn’t start frying (bubbling) immediately, the oil is too cold, if the hole turns brown right away, the oil is too hot. Adjust the heat accordingly.
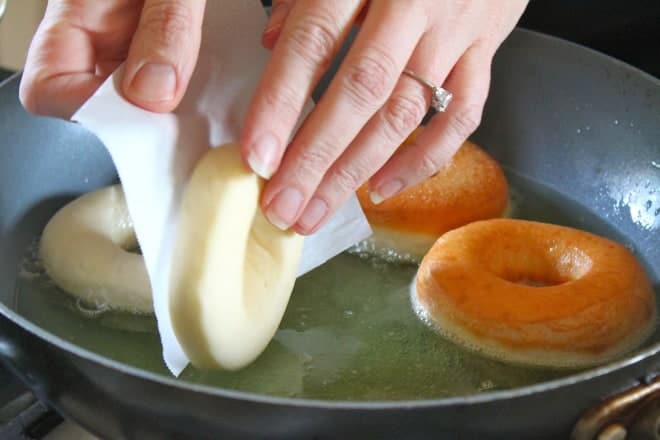
Drop the donuts and donut holes into the hot oil using the paper to carefully lower them into the oil.
Turn them over as soon as they become golden brown on the underside, then remove and place on a paper towel lined plate or baking sheet once they are ready.
How Should You Finish Your Donuts
-
Sugar Coated Doughnuts
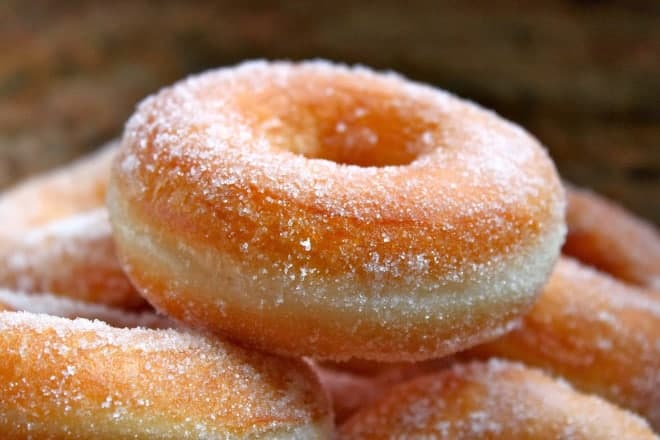
When the doughnuts have cooled, roll them in sugar to coat evenly.
You can also use powdered sugar to coat them. I remember liking the Dunkin’ Donuts chocolate kreme filled donuts when I was a young transplant to the US in the late 1970s! They were filled with a fake chocolate “cream” and coated with confectioner’s sugar! I don’t think I’d like them today. Now I’m wondering if they still make them?
Put some powdered sugar in a small bowl and add a little bit of milk or water. Stir and keep adding liquid until you reach a smooth, slightly runny consistency. You want the glaze to run off the doughnuts when you’ve dipped them.
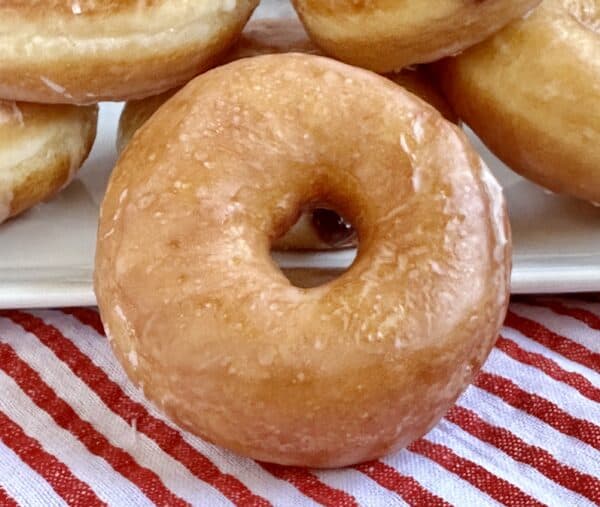
Dip a donut hole to test the glaze, and place it on a cooling rack to set. If all the glaze runs off, add more sugar, and if it’s too thick, add more liquid. No measuring needed.
-
Filled Doughnuts
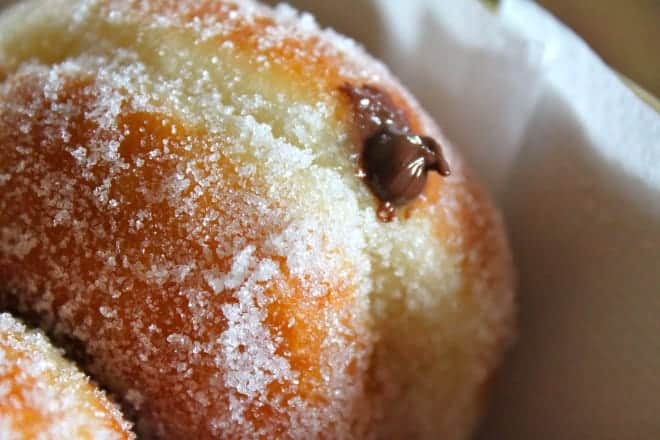
If you choose to fill the large yeast doughnuts, push a skewer into the center of the doughnut to make a hole. Next, put some room temperature jam, or slightly warmed chocolate hazelnut spread (I’ve gone off Nutella since they’re using tons of palm oil) into a piping bag and pipe the filling into the doughnut.
-
Scottish Style Yeast Doughnuts with Jam and Cream
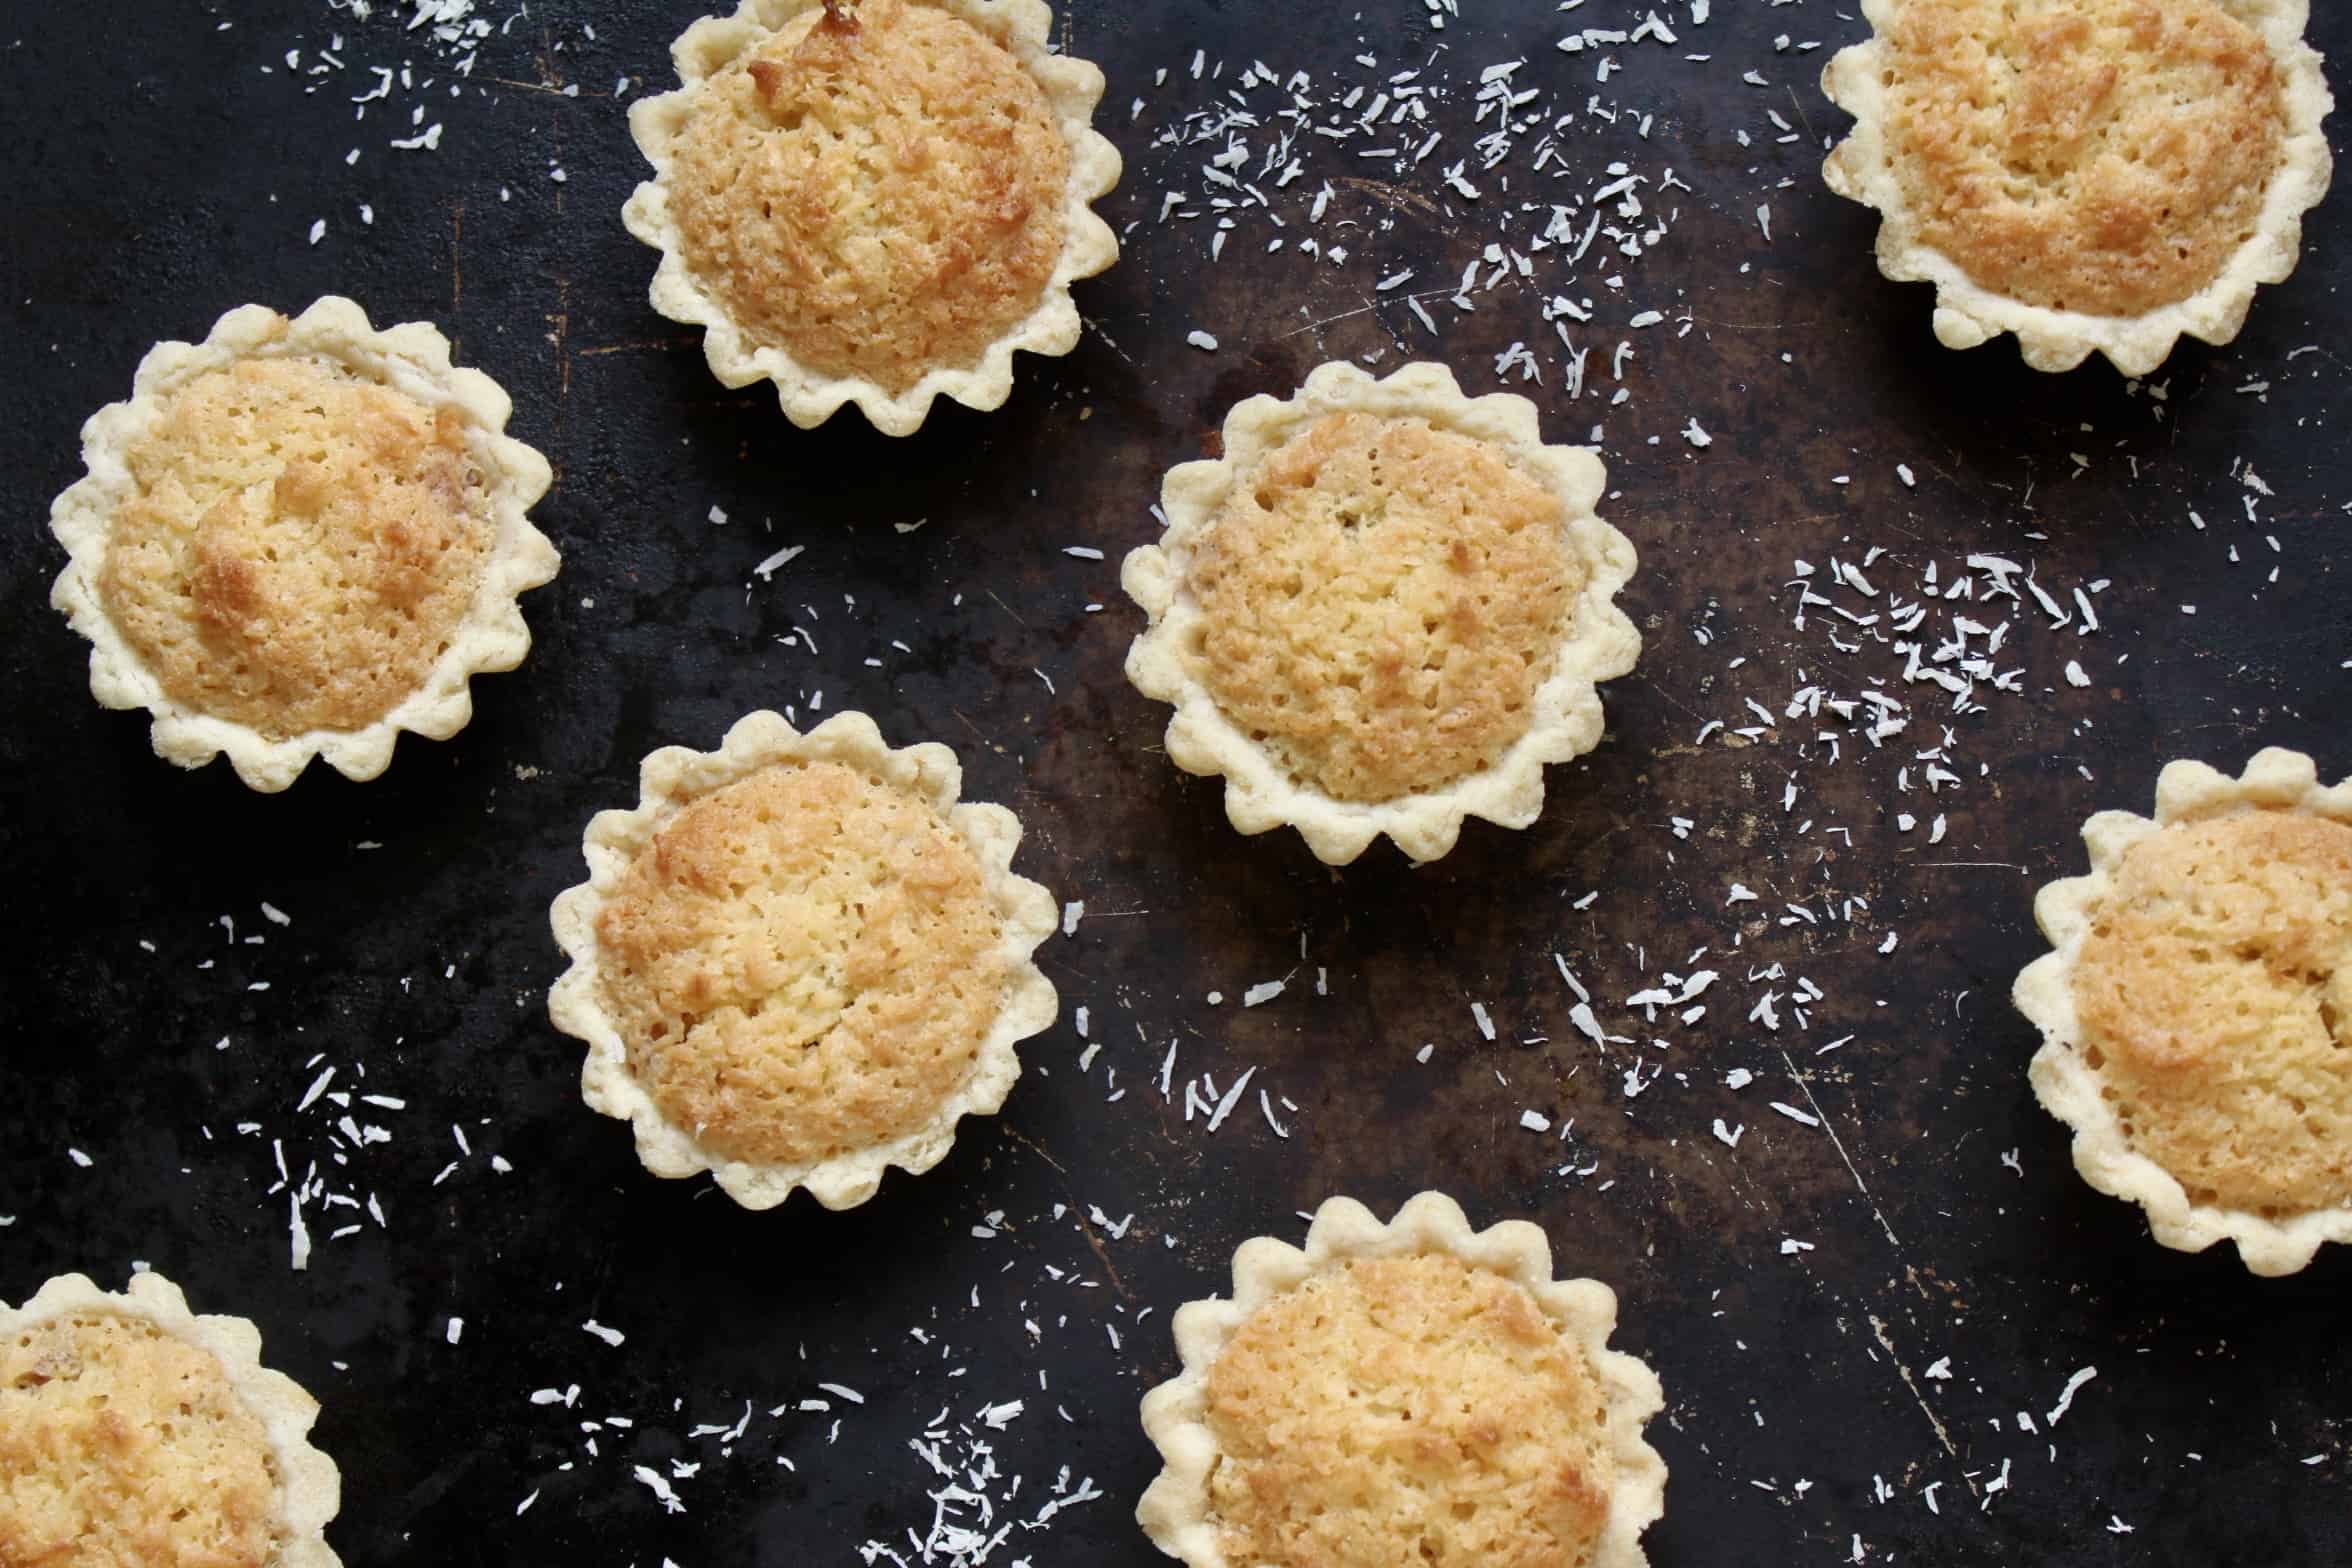
If you don’t already know, raspberry jam is a frequent ingredient in Scottish fare, like these coconut and raspberry tartlets.
And finally, this is why I shared this doughnut recipe: I recently (now it’s about 10 years ago!) received this message~
“One day at work your brother showed me a picture of some absolutely perfect-looking donuts you made. Any chance of posting that recipe?” -Destruction

Yeast Doughnuts vs. Baked Doughnuts

For me, there is no comparison. Yeast doughnuts are a delight in how simply light and airy they are because they are leavened with yeast. Frying them makes them even lighter. In contrast, baked unleavened donuts, often called cake donuts, seem like a whole other pastry, and are quite heavy and dense. Which do you prefer?
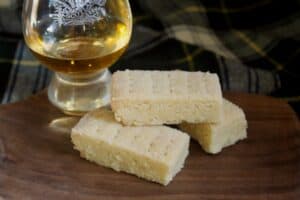
Another of my readers’ favorite recipes: authentic Scottish shortbread
Don’t miss another post! Sign up for my free subscription at the top of this page.

Perfect Yeast Doughnuts
Ingredients
- 6 Tbsp water lukewarm
- 5 oz buttermilk at room temperature
- 1 egg at room temperature
- 2 oz butter melted
- 16 oz all-purpose flour (or bread flour)
- 2 oz sugar
- 1 tsp salt
- 1 ½ tsp quick-rise yeast (or regular dried yeast)
- 16 oz olive oil for frying
- 4 oz sugar (1/2 cup or more as needed for coating the doughnuts)
- jam, chocolate hazelnut spread, and or whipped cream for filling, if desired (various amounts as needed)
Instructions
FOR BREAD MACHINE:
- Place the water, buttermilk, beaten egg and melted butter in the bread machine pan, then add the dry ingredients which were weighed using a scale (it's so important), except for the yeast. Make a small indentation in the dry ingredients, then add the yeast. Set the bread machine on the ‘dough’ setting.
FOR STAND MIXER WITH DOUGH HOOK, OR BY HAND:
- Place the dry ingredients in a bowl. Put 6 Tbsp of lukewarm water in a cup and sprinkle the yeast on top, set aside for about 5 minutes, until the yeast begins to react (you can add a pinch of sugar to help it). Make a well in the center of the dry ingredients, then pour in the buttermilk, egg, melted butter, and yeast mixture. If using a stand mixer, run with the dough hook until a dough forms then continue for about 5 minutes.
- By hand, knead for about 10 minutes. Cover and set aside until at least doubled in size (usually 1 to 2 hours, depending on the freshness of the yeast, temperature of the water and ambient temperature).
BOTH BREAD MACHINE, STAND MIXER/HAND INSTRUCTIONS FOLLOW BELOW:
- Once the dough has doubled, place it on a floured surface and knead lightly. Divide it in half, keeping half the dough covered, so it doesn’t form a skin. With a rolling pin, roll out half of the dough to about 1/2″ thickness.
- Cut with a round, sharp cookie cutter (about 3″ diameter) then make the holes with a smaller cookie cutter (about 1″ diameter), saving the holes. Or splurge (haha) and buy this doughnut cutter and save yourself a lot of trouble!
- Place each doughnut on a piece of parchment or waxed paper, then place on a cookie sheet. Put the tray in the oven (turn it on for 1 minute, SET A TIMER, then turn it off again, just to make it barely warm).
- Next, boil some water and pour it into a measuring jug. Place the jug of water in the oven with the tray of doughnuts (this will create steam will keep a skin from forming). With the remaining dough, divide into quarters, then divide each piece in half to make 8 equal amounts. Roll each piece of dough into a smooth ball, and place on parchment or waxed paper pieces and place on a cookie sheet; place in the oven with the other doughnuts to rise until doubled in size.
- Heat the oil to about 350ºF (180º). If you don’t have a candy thermometer, test the oil with a doughnut hole: if it doesn’t start frying immediately, the oil is too cold, if the hole turns brown right away, the oil is too hot. Adjust the heat accordingly.
- Drop the doughnuts into the hot oil using the paper to carefully lower them into the oil. Turn them over as soon as they become golden brown on the underside, and remove them and place on a paper towel lined platter once they are ready.
- When the doughnuts have cooled, roll them in sugar to coat evenly. If you choose to fill the large doughnuts, push a skewer into the center of the doughnut to make a hole, then place some room temperature jam, or slightly warmed chocolate hazelnut spread into a piping bag and pipe the filling into the doughnut. Using an iSi Whipper or piping bag, pipe fresh cream into a doughnut cut in half (add some jam first if you like).
Notes
Nutrition
Tips and Questions
Please do not write to ask me any questions if you did not weigh the ingredients, or follow the directions as written. As you can see, there are over 1000 comments and many are questions; please read the following FAQs first.
Question: Can I make the dough ahead of time and fry them the next day?
Answer: Yes! Make the dough and put it in the refrigerator in a sealed container, (but it needs room to expand) and then bring to room temperature, roll and cut and continue. Just remember: the dough will form a skin if exposed to the air and it will ruin your doughnuts. Always keep the dough either in a sealed container or in the oven, with a little hot water for humidity.
Question: My dough is very sticky, even after letting it knead for over 5 minutes after it formed a dough; what did I do wrong?
Answer: If you weighed the ingredients and didn’t make a mistake, it may just be the flour you’re using, the humidity in the air or another factor. Just add a little flour, just enough so that you can work with the dough. However, if you add too much flour, your doughnuts won’t be light.
Question:Can I bake the doughnuts?
Answer: No, unfortunately, they simply won’t turn out anything like they’re supposed to. I do not recommend it because these are meant to be deep fried.
Question: Can I substitute x ingredient?
Answer: I have successfully made these yeast doughnuts without eggs, butter and milk. Please look at the following recipe to substitute any of these: VEGAN YEAST DOUGHNUT RECIPE.
Question: Can I use instant yeast?
Answer: Yes. Instant yeast is the same as quick-rise yeast.
Question: Can I freeze the doughnuts once they’ve been fried?
Answer: The fried doughnuts can be frozen, but I honestly wouldn’t recommend it. These yeast doughnuts are best when eaten fresh, just like a French baguette. Day old doughnuts are no fun!
Question: I don’t have buttermilk, what else can I use?
Answer: Use regular milk with a little lemon juice (1/2 tsp.)
Question: What temperature do I set the oven to when I’m warming it up to proof my dough and doughnuts?
Answer: It doesn’t matter; whether it’s set to 150 F or 200 C, you’re only leaving the oven on for a few seconds, then turning it off, so there’s not enough time for it to get up to any set temperature.
Shop some of my favorite doughnut items,
kitchen tools and more in my Amazon shop,
Christina’s Cucina is a participant in the Amazon Services LLC Associates Program, an affiliate advertising program designed to provide a means for sites to earn advertising fees by advertising and linking to Amazon.com.







Hello Christina! I’ve made this recipe 3 times now and it’s so good! All my friends and coworkers love it. I have a question about forming the donuts. When I roll out the dough it stretches back significantly and after I cut the donut holes, the donuts shrink inwards which then misshapens them when frying. Do I need to knead the dough more or chill it first so it won’t shrink as much when rolling? Any feedback would be greatly appreciated. Thanks!
Hi Kyle, I’m glad you love them along with everyone else!
Regarding the shrinking, has it happened every time? I honestly don’t know what would cause that and so what to tell you to do differently. If you follow the directions exactly as written, they should come out without the stretching problem. I’ve never had that happen, so I don’t know. Sorry I can’t be more helpful, but I’ll ask around and see if I can get an answer for you.
Hey Kyle! I used to make donuts for a living so I can tell you that happens when you don’t release the dough from the rolling surface. So what you do after rolling it out is, you lift a corner of the dough and just lift it slightly till you feel all the dough lift off from your counter or what have you.
Christina Thank you for this excellent recipe. I can now cross off “Successfully make home-made yeast doughnuts” off my bucket list. The first time making doughnuts for my grandson’s birthday party and they turned out exactly as pictured in your photograph and were light, airy and delicious. Made two batches and there was not a single doughnut left after the party.
I live in South Africa and was warned that our flour is not as strong as those from overseas but whether that is true or not my doughnuts were soft, airy and delicious.
Thanks for changing your measurements to weights as this enables any person following the recipe to ensure that the ingredients used in the recipe will be correct if an accurate scale is used.
Keep up the good work. I write hubs and know how much time and effort goes into designing and producing articles of this standard. Well done.
Laura
Hi Laura, I can’t thank you enough for your kind words! You’ve made my day! So happy it worked for you in South Africa and that your grandson was able to have fresh, homemade doughnuts for his birthday! Just wonderful!
Thank you so much! I appreciate your review more than you know! CC
I’ve made this recipe about 15 times now, and have used wax paper every time. The only time I had an issue with it sticking was because I’d let them rise too long on the second rise. If that happens, knead them again and do a third rise, which will be very short because it’s all nice and warm already.
Thanks for that information, Jen. Good to know waxed paper DOES work. People are quick to blame the recipe when they make a mistake (but don’t realize it’s their mistake).
Hello! I completely understand you not giving an amount of time for the dough to double in size while rising, but I wondered if you can give an estimate for when you make it? I don’t know if we’re talking 2 hours or 6… I want to make these for breakfast, but if it takes most of the day, I will try the overnight proofing.
Thanks!
Kalah
Hi Kalah, gotcha. Closer to 2 than 6. If it takes 6 hours to double, there’s a problem with the amount or freshness of yeast. Hope this helps! Enjoy!
Marvelous, thanks!
I put mine in a slightly warmed oven with a mug of boiled water (as for the second rise) and find 1 hour isn’t quite enough, but 1.5 covers it. I also warm my milk and butter quite a bit and stir them into the flour, salt and sugar mix before I add the yeast water so that it’s already warm. The second rise is very quick – probably 15 minutes.
Exactly why I don’t put an precise time. You’re using warm ingredients so your rise will be quicker than someone who doesn’t, but there are still room temperature and freshness of yeast, which can affect the rise time. Thanks for the info.
Thank you! I adapted your recipe to a vegan version, using flax seed ‘eggs’ (1 egg = 1tbsp ground flax seed, 2tbsp water), soy milk and vegan butter, and it works perfectly. I add a tiny bit less milk than in your recipe to get the dough the right consistency, but the rest translates straight over, and it’s delicious!
The reason folk have had issues with the wax paper is, I think, because they’ve left the dough to rise a little too long on the second rise. I’ve made the recipe about half a dozen times now, and only had that issue the first time. If you knead it all together, reshape it all and do one more rise, it still works perfectly, so all is not lost if you do let it rise too long. I find it a very forgiving recipe!
That’s great to hear, Jen and it really does say something about the fact that the recipe can even be made VEGAN and STILL turn out! I’m glad you left this review as it really is a fabulous recipe. Thank so much, it really helps other readers! :)
Karla,
I can assure you that the dough didn’t rise because you either didn’t follow the directions as stated OR your yeast was old. Guaranteed. This is a solid recipe and is foolproof if the directions are followed, with fresh yeast.
I have to say, it’s beyond frustrating for me to see a two star rating on a 5 star recipe (it’s not originally my recipe, so I’m not tooting my own horn). Imagine if you did something all the time and it came out perfect and you explained how to do it to others. 90% of them follow through and are ecstatic with your lesson, but there’s 10% who did something wrong, but blame YOU and publicly leave you a review saying how bad the results were. How would you feel about that?
I know you won’t try it again, but I know for a fact that the recipe was not the reason for your “epic fail.”
-CC
Or perhaps you overheated the water you put the yeast in and killed it…?
I tried my best to do this and now my dough is resting in the warm kitchen. I so hope it will rise up, since I somehow do not operate well with yeast, but if I fail,I would use the dough for something else and then I will make another dough, trying a different technique my mom told me.
Wish me luck,
Good luck Dana, but honestly, if you follow each step, and you are using fresh yeast, you won’t need luck! They’ll be perfect! Let me know how it goes! :) CC
Hej Christina, i am writing from Danmark, i am so going to try these out tmr. for my kids school fair. Looks to delicious and i love the pictures and step by step instructions. Thx.
Natasha.
That’s wonderful, Natasha! I’m sure you’ll have a scale so they will be great! :) The kids will love them! Thank you for letting me know, and tell me how they come out! CC