

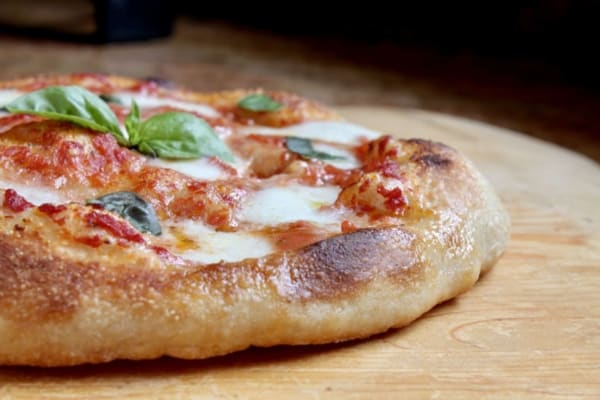
Best Homemade Pizza Dough Recipe (Authentic Neapolitan Style)
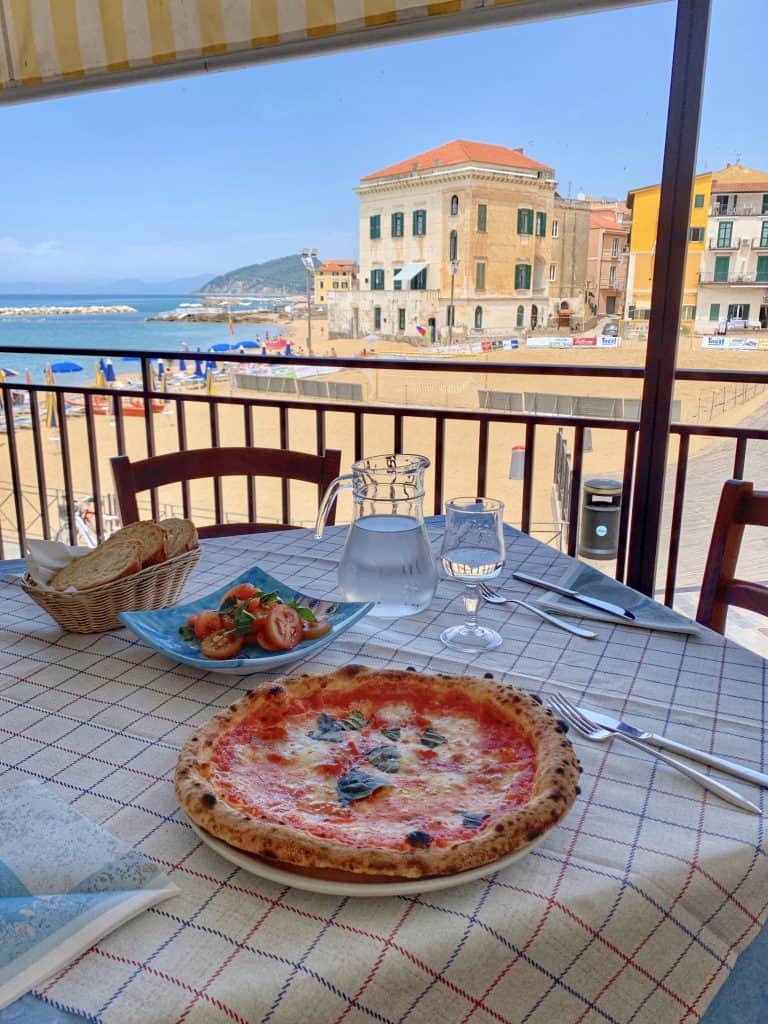
The best homemade pizza dough recipe is in your hands. If you’ve ever been to Southern Italy (the home of pizza), this will take you back to the pizza you ate there. Trust me on this; you’ll be thanking me later!

My original pizza dough recipe was published May 4, 2012.
Homemade pizza dough isn’t a difficult thing to make at all. Like any other kitchen creation, the end result will depend on which recipe and which ingredients you choose to use.
As an Amazon Associate I earn from qualifying purchases.
This is the single most important decision you will always make when cooking or baking. My site isn’t a huge collection of my own recipes, but a collection of others’ recipes that have worked marvelously for me, and I pass them on to you! Although I’ve been making pizza almost all my life, I would never consider myself worthy of sharing a fabulous homemade Neapolitan pizza recipe.

Do you recall seeing him on Stanley Tucci’s Searching for Italy? (Very first episode.)
So allow me to introduce you to the recipe’s author (who learned from his father, who was also a master pizza maker in Italy), Maestro Pizzaiolo Vito Iacopelli. His is the best pizza dough recipe you will ever find.

Maestro means “teacher” in Italian, and a “pizzaiolo” is a pizza maker from Southern Italy, so why on earth would you use any other homemade pizza dough recipe? Just like you’d want a recipe for jambalaya from a source in Louisiana, why would you want your pizza recipe from anywhere but the best Italian source?
I have had the pleasure of meeting Vito several times here in Los Angeles, I’ve watched his video tutorials, and even purchased his Masterclass on pizza-making. He is the best teacher and absolutely a riot to watch! He’s so passionate about pizza, you won’t believe it, and that’s why I want to tell you all about him and share his recipe.

Honestly, this pizza dough recipe will change your life (Vito says this, and it’s true)! Pair it with this pizza sauce recipe (which is the same as Vito and all other pizza chefs use in Southern Italy) and your homemade pizza-making skill will improve exponentially! Vito gives all the secrets to what makes authentic Italian pizza so much healthier than American-style pizza.
Last September I had a pizza-making lesson at medeaterranea Accademia Enogastromica in Naples, Italy. Master Pizzaiolo Mimmo Onze gave our press trip participants a class on making authentic Neapolitan pizza. Vito’s recipe is practically identical to the one Mimmo had us use because pizza-making has been perfected in Naples.

What’s the Secret for the Best Pizza? POOLISH (or BIGA)
You’ll never imagine that making a prefermented dough called POOLISH, is a game changer for pizza dough. You probably won’t be surprised to hear that using the best quality ingredients is key in this recipe, too. What makes the pizza so different? Besides the quality of ingredients, the way that the dough is made will make the pizza so much more easily digestible.

What is Poolish?
A pre-fermented dough called poolish is what is used to make this Neapolitan style homemade pizza dough. It’s not difficult to make at all, and takes only a minute or two to prepare. What you do need to do is plan ahead to make this pizza dough, that’s all. Once you have the poolish ready, it’s just a matter of following Vito’s step by step directions for the perfect pizza dough!
I need to remake my potato pizza using Vito’s homemade pizza dough recipe!

I encourage you to watch the video for this recipe (I’ve linked to it below) and subscribe to Vito’s YouTube channel. He has so many pizza-making videos so you can keep learning and improving.
If you need an easier recipe, look no further than this no knead pizza dough recipe.

My pizza is far from perfect, but I can’t tell you how much better it is than before I started using Vito’s homemade pizza dough recipe!

Can I Freeze this Dough?
YES! Vito gives step by step directions on how to properly freeze pizza dough.
If you don’t like a super thin Neapolitan style pizza, just keep the center of the dough a wee bit more thick, and you’ll have a more Roman-style pizza (thicker bottom crust).

IMPORTANT: I have already received several email requests to add the ingredients in cups. I usually do this with almost all of my recipes, but if it means the recipe will fail, I refuse (like my doughnut recipe and this pizza dough). You will NEVER find a pizza chef in Italy measuring their ingredients with cups, just as you will never find a French pastry chef using them. THEY ARE IMMENSELY INACCURATE. Please spend what it costs for a couple of coffees to invest in a scale. I promise, they are easier to use than cups!
The Best Homemade Pizza Dough Recipe
Very slightly adapted from Maestro Pizzaiolo Vito Iacopelli Makes Five 12″ pizzas
FULL PRINTABLE RECIPE BELOW
PLEASE BUY A SCALE INSTEAD SO THE RECIPE WORKS. Vito (and all other chefs) does/do not use cups for a reason: they are inaccurate. If you choose to use the cups measurements, please do not come back to leave a bad review. You have been duly warned.
Poolish (for the recipe post on POOLISH)
- water
- 00 Italian flour (double zero flour is the best for pizza-making, and I highly recommend it) or organic, non-bleached/bromated all-purpose or bread flour, but this won’t be as good as Italian flour
- dry yeast
- honey
Dough
- water
- poolish (after 16-24 hours)
- 00 Italian flour
- Kosher or sea salt
I recommend starting the poolish the night before want to enjoy your pizza the next day.
Make the Poolish

Mix all the poolish ingredients together in a small glass or plastic container until it has a uniform consistency. Leave at room temperature for one hour, then place in the fridge for 16 to 24 hours. After resting in the fridge, it will look like this.

THE NEXT DAY: Make the Dough

Put the water for the dough into a large bowl then add all of the poolish. You can use the poolish straight out of the fridge, no need to come to room temperature. Mix together until the poolish loosens and mixes into the water.

Next, add half of the flour and mix well (I like to use a Danish whisk).

Add the salt.

Then add the remaining flour.

Mix just for a few seconds, then turn out onto a board or counter to mix by hand. After it all comes together (it will be very sticky) turn the bowl upside down over it and let it rest for 15 minutes.

Prepping the Dough and the First Rise.
After 15 minutes, put some oil on your hands and take the dough up with both hands underneath and allow the two ends to fall, creating an air pocket inside. Continue to pick up the dough and repeat this process, turning a quarter turn each time (Vito’s video below will help with this step). Oil the original bowl and place the dough in the bowl, always keeping the top side up. Allow to rise for an hour.

Making Balls of Homemade Pizza Dough and Second Rise.

Next, cut into 5 equal sized pieces.

Fold and roll the pieces into balls, being sure to keep the top facing upwards when you are finished.


Place them on a tray sprinkled with fine semolina flour, or flour so that it doesn’t stick.

Top each ball with a little olive oil, cover with plastic wrap.

Alternatively, place in the oven (without turning it on) and place a jug of boiling water inside with the tray. Allow to rise for two more hours.

If using a pizza stone, put it in the oven and turn on the oven to an hour before the pizza is ready. This will ensure the pizza stone is super hot. If using a countertop pizza oven, there’s no need to heat it up this early.
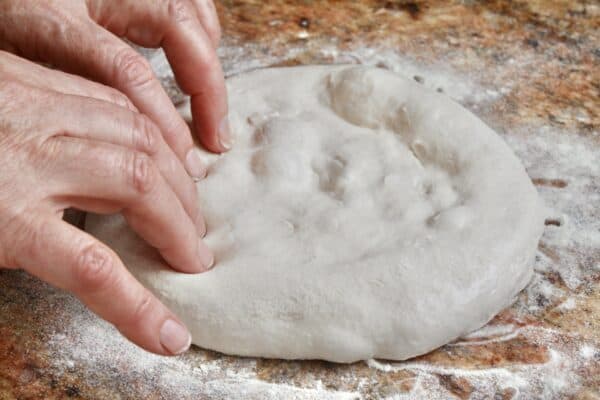
Shaping the Pizza Dough
After two hours, take one ball of homemade pizza dough and put in on some semolina flour, top and bottom, always keep it right side up when you finish. Start pushing the dough in the center towards the edges.
If you have an indoor countertop pizza oven (this one is similar to the one I have) you want to have the dough on the pizza peel at this point.
Top and Bake the Homemade Pizza Dough
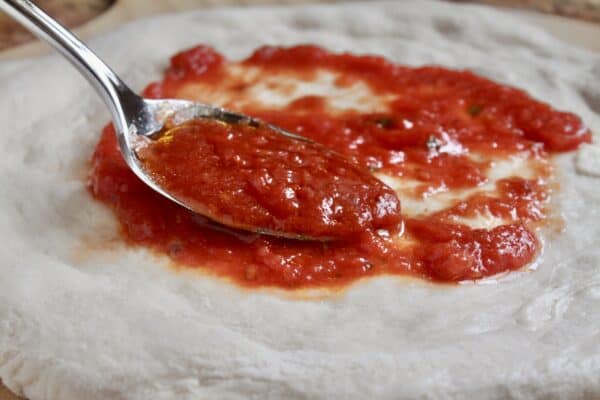
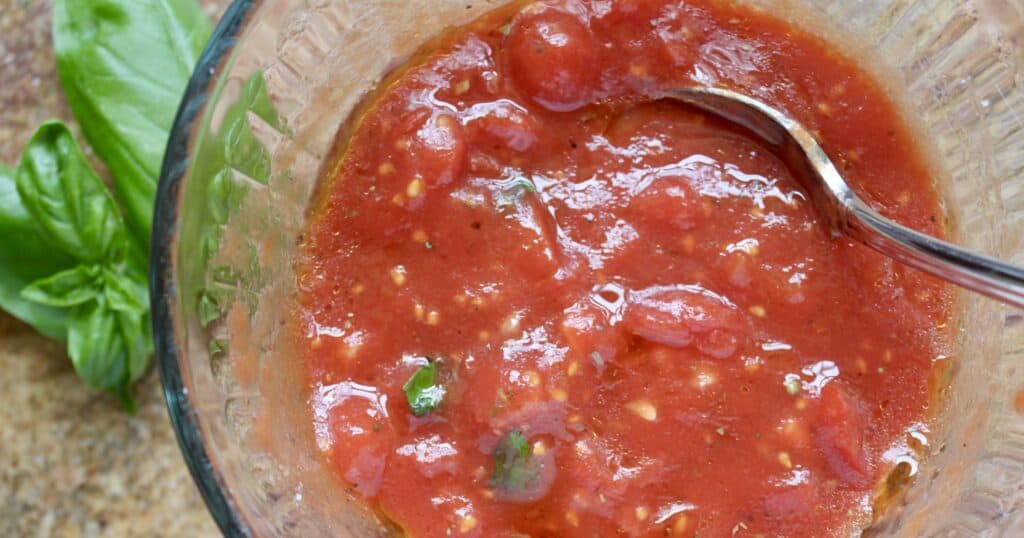
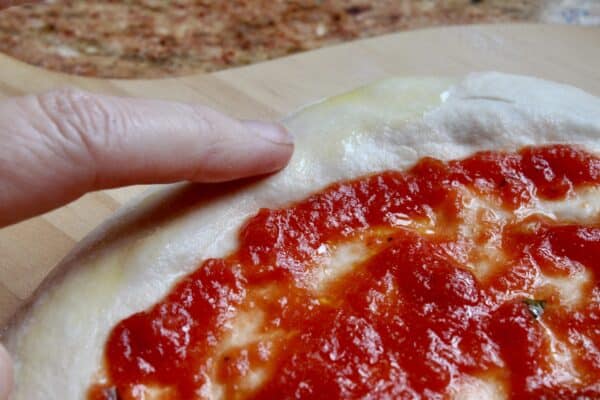
I strongly suggest using this pizza sauce recipe. This is how Vito makes his sauce, too. He also suggest oiling the edge. Check out my Italian tomato factory tour to understand why Italian canned tomatoes are the best quality you can buy.
I use a counter-top pizza oven, but you can use a pizza stone as Vito does in his video tutorial.

Add the toppings you desire and bake according to your pizza oven, oven with stone or counter top oven directions. This mushroom, truffle, brie and arugula pizza is one of my favorite ways to top pizza that doesn’t include tomato sauce.

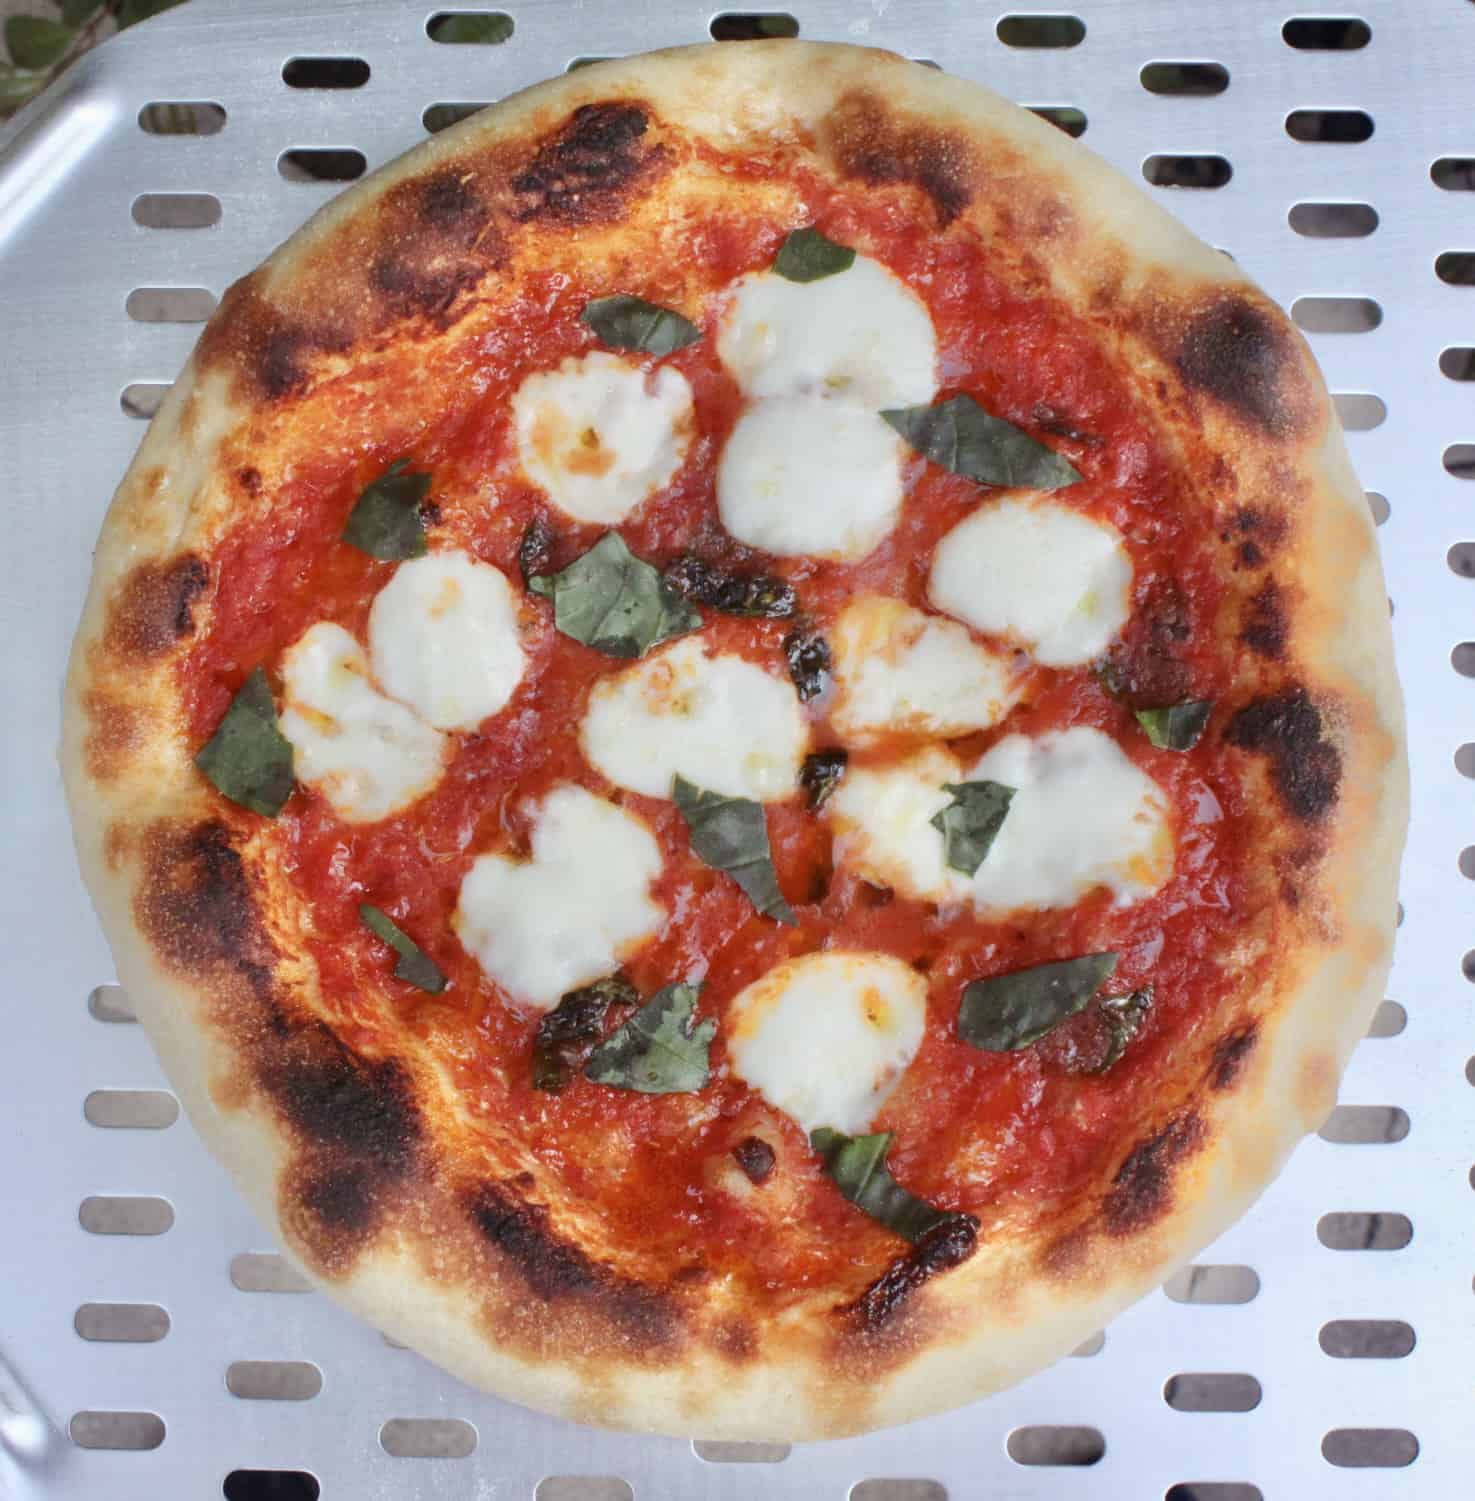
Finishing and serving the pizza.
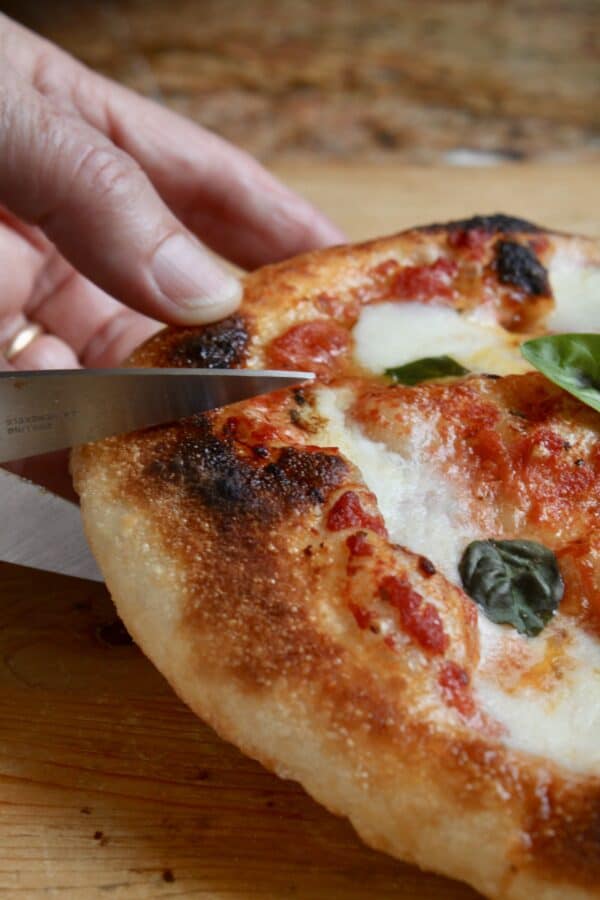
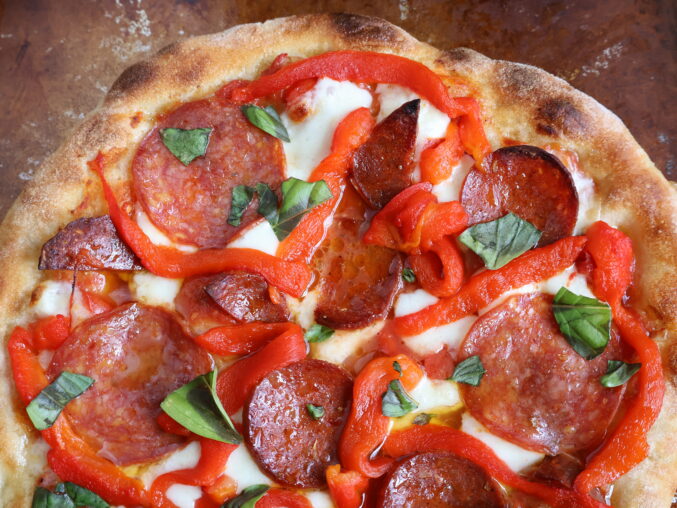
Cutting pizza with kitchen shears works really well. See the holes in the pizza crust? Again, my pizza is nothing like Vito’s yet, but I’m working on getting there and you can, too!
Let me know what you think if you try this recipe. Also be sure to subscribe to Vito’s YouTube channel and give him a thumbs up! And if you’re in the Puglia region of Italy, go visit Soft and Crunchy, and have some pizza straight from the source!
Watch Vito’s video on how to make Neapolitan pizza at home!
Best Homemade Pizza Dough Recipe (Authentic Neapolitan Style)
Ingredients
Poolish
- 3 ½ oz water minus a teaspoon (I recommend metric)
- ⅔ c 00 Italian flour double zero flour is the best for pizza-making, and I highly recommend it or all-purpose or bread flour (I recommend metric)
- 1 tsp dry yeast
- ½ tsp honey
Dough
- all of the poolish after 16-24 hours
- 13 ½ oz water
- 5 ½ c 00 Italian flour plus a tablespoonful of flour (I recommend metric)
- 2 ½ tsp sea salt
- 1 Tbsp olive oil for your hands (measurement isn't specific)
Instructions
Make the Poolish
- Mix all the poolish ingredients (weighed on a scale) together in a small glass or plastic container until it has a uniform consistency. Leave at room temperature for one hour.
- After an hour, place in the fridge for 24 hours.
THE NEXT DAY: Make the Dough
- Put the water for the dough into a large bowl then add all of the poolish. Mix together until the poolish loosens and mixes into the water.
- Next, add half of the flour and mix well (I like to use a Danish whisk).
- Add the salt.
- Then add the remaining flour.
- Mix just for a few seconds, then turn out onto a board or counter to mix by hand. After it all comes together (it will be very sticky) turn the bowl upside down over it and let it rest for 15 minutes.
Prepping the Dough and the First Rise
- After 15 minutes, put some oil on your hands and take the dough up with both hands underneath and allow the two ends to fall, creating an air pocket inside. Continue to pick up the dough and repeat this process, turning a quarter turn each time (Vito's video below will help with this step).
- Oil the original bowl and place the dough in the bowl, always keeping the top side up. Allow to rise for an hour.
Making Balls of Homemade Pizza Dough and Second Rise
- Next, cut into 5 equal sized pieces.
- Fold and roll the pieces into balls, being sure to keep the top facing upwards when you are finished.
- Place them on a tray sprinkled with fine semolina flour, or flour so that it doesn't stick.
- Top each ball with a little olive oil, cover with plastic wrap.
- If using a pizza stone, put it in the oven and turn on the oven to 500F (260C) or as hot as it can be set, an hour before the pizza is ready. This will ensure the pizza stone is super hot. If using a countertop pizza oven, there's no need to heat it up this early.
Shaping the Pizza Dough
- After two hours, take one ball of homemade pizza dough and put in on some semolina flour, top and bottom, always keep it right side up when you finish. Start pushing the dough in the center towards the edges.
- If you have an indoor countertop pizza oven, you want to have the dough on the pizza peel at this point. Follow the directions of your pizza cooker.
Top and Bake the Homemade Pizza Dough
- I strongly suggest using this pizza sauce recipe. This is how Vito makes his sauce, too. He also suggest oiling the edge. Check out my Italian tomato factory tour to understand why Italian canned tomatoes are the best quality you can buy.
- I use a counter-top pizza oven, but you can use a pizza stone as Vito does in his video tutorial.
- Add the toppings you desire and bake according to your pizza oven, oven with stone or counter top oven directions. This mushroom, truffle, brie and arugula pizza is one of my favorite ways to top pizza that doesn't include tomato sauce.
Finishing and serving the pizza
- Once the pizza comes out of the oven, add some fresh basil (if making a classic Neapolitan style.) Cutting pizza with kitchen shears works really well.
- My pizza isn't quite like Vito's yet, but I'm working on getting there and you can, too!
Notes
- VERY IMPORTANT: if you change the number of servings to adjust how much dough you want to make, follow the ingredient changes EXCEPT FOR THE YEAST AND HONEY, those will stay the same, no matter how much you make!
- Nutrition info is for the crust only.
- I recommend starting the poolish the night before you want to have pizza for dinner.
- Let me know what you think if you try this recipe. Also be sure to subscribe to Vito’s YouTube channel and give him a thumbs up!
Nutrition
Christina’s Cucina is a participant in the Amazon Services LLC Associates Program, an affiliate advertising program designed to provide a means for sites to earn advertising fees by advertising and linking to Amazon.com.
WHAT ARE THE US MEASUREMENTS
Hi John, I think you used the skip to recipe button, therefore missed this important note: “IMPORTANT: I have already received several email requests to add the ingredients in cups. I usually do this with almost all of my recipes, but if it means the recipe will fail, I refuse (like my doughnut recipe, and this pizza dough recipe). You will NEVER find a pizza chef in Italy measuring their ingredients with cups, just as you will never find a French pastry chef using them. THEY ARE INCREDIBLY INACCURATE. Please spend what it costs for a couple of cups of coffees to invest in a scale. I promise, they are easier to use than cups!”
Simple answer is: when in culinary school, the very first lesson in baking was drilled into our heads that whenever baking the hard rule is you always weigh ingredients even the liquids especially butter. I agree with Christina spend $20 – $30 bucks on a digital scale, it will change your success rate dramatically. Also always be very mindful of temperature, humidity, and water purity. Good luck and live, love, and most importantly ENJOY food ! Cheers
Hear, hear! Thanks, David!
Hi Christina. I was looking for pizza sauce spices, and stumbling on you found so much more! Thanks for posting this. I have too many questions! Can part of the dough be saved as a starter for next time or do you have to make poolish each time without fail? I’m pulling out my 60L spiral mixer, and plan to freeze 400g dough probably in bags coated with olive oil inside. I will likely let rise, knead and rise again, after defrost. Any thoughts? I made a potato pizza yesterday, then only today saw yours! Keeping my eyes open for bulk ingredients. Thanks so much!
Yay! You probably discovered you don’t need spices if you want a truly authentic Italian pizza, right? I don’t know about using part of the dough as poolish next time, I honestly would only test a little bit doing it that way. Good luck to you, I think you’re going to be hooked!
I’ve vacuum sealed portioned and balled finished dough. It “works’ for the mosh part but you don’t quite get, as Vito says, that nice craaaanchy crrrust with the bubbly soft edges because unless you can flash freeze it the ice crystals grow much larger and damage the dough to an extent. It’s still really good though. And I would not oil the bag for storage, no need and it might ruin the dough because at freezing temperatures water and oil really don’t play nice with each other. And when you store it, remember which side of the dough is the top! I would certainly only use either vacuum sealed storage or a zipper top bag using the immersion method to remove air so the dough doesn’t get a bunch if ice crystals in and on it. Also that way when you go to thaw out the dough, you can set it under tepid streaming water for a nice gentle wake up. Oh, also, very important, freeze it the day you finish it, don’t wait a couple days.
So helpful, David. Thank you!
Hi Robert. I failed to mention in my first reply my opinion about reserving some finished dough as a starter. This is a risky endeavor. I feel your pain because I absolutely hate throwing out my sourdough starters when feeding it. Sourdough starter can be used to make delightful pasta but that’s another convo. As for reserving the finished pizza dough as a poolish, you would have to figure out the perfect storm of time, temp, moisture, the amount of remaining active proteins and leavening agents left in the finished dough and then how to bring them around with the right amount of food for it. IMO I would just start with a new poolish as its not a lot of ingredients. It theoretically could work but its just way more work than new poolish. Enjoy cooking!!!
Hi I’m so confused by your recipe probably my fault the measurements are different from Vito’s is this a sigle recipe or double Vito recipe is totally different maybe I am misunderstanding it if you’re having it are you also halfing the Polish this flour is so expensive and I don’t wanna make a mistake you have 625 grams of 00 flour in your dough
in your recipie and Vito has 500
Grams I would appreciate it if you can let me know thank you so much
Hi Nadia, I don’t know where you saw Vito has 500 g as he has 1250g of flour for the main part of the dough. To answer your question, this is half of Vito’s recipe as I found it to be too much to make at once. Also, I think for anyone making this for the first time, it’s better to do a smaller amount as it’s easier. Practice makes perfect with this recipe and once you get the hang of it, make Vito’s amounts with confidence. :) Hope that helps.
Thank you so so much for getting back to me so soon I will follow this exactly as you have on your site thanks again so very much I so appreciate your fast response Nadia 👩🍳👩🍳👩🍳👩🍳👩🍳👩🍳👍
No problem, you’ll love it, Nadia! :)
This is so good! I ended up not planning well and didn’t wait for the second rise (gave it about 20 minutes rather than 2 hours). It was still so incredibly delicious, I cannot wait to try another of the pizza’s tomorrow after it has risen properly. I have a niece and nephew in Germany who told me about a popular topping there (canned tuna and onions) and I gave it a try. I was so surprised how delicious it was. With this dough, the amazingly simple and delicious sauce, carmelized onions and black olives! Try it!
Awesome, Paula! It will be the best base for any toppings you choose. Thanks for letting me know!
Just wondering if the dough balls can be kept in the fridge overnight (or longer) and at what stage would you refridgerate them? After the 2 hour second rise?
The dough will continue to proof, Ben, and at some point will begin to sour. It won’t be bad, but will taste like sourdough. For best results, I’d refer to Vito’s YouTube videos, as he has one for everything including storing and freezing and defrosting the dough.
belated answer, but you can freeze the dough. put it in a receptacle that’s been lightly oiled to make sure it can be freed and take it out of the freezer a couple of hours before you need it. it’ll slowly defrost and continue to proof and it’ll work like normal.
I think the qtyof salt for the dough is doubled. I notice the video he is making 10 balls your recipes is for 5 but the salt is nearly double. Great recipe for the sauce and the dough, thanks for passing along.
Hi Tim! No, the quantity is half, not double. I simply give the ingredients to make 5 balls of dough instead of 10, so the ingredient amounts are halved. Let me know if you give it a try!
How long can you store the finished Dough?
It will continue to rise and will start to go “sour” which isn’t bad, unless you don’t want that flavor, so I would say a day or two. You can search Vito’s videos on YouTube to see what he advises on storing, keeping and freezing dough. :)
I will definitely have to try this recipe! I have been trying to make an authentic pizza while having to deal with a home oven. My recipe is very similar to this in that I use “old dough” that I mix into my new dough. I let it sit over night in the fridge, and use a 00′ flour, but with a bit of bread flour to help browning since I don’t have a brick oven. My pizzas look like yours, but this is different enough that I am curious about the taste! Can’t wait to try it!
Missed this, Maria, but I hope you’ve tried this recipe by now and so I can ask how it turned out for you?