

Shortbread Pie Crust (How to Make a Pie Crust: Quick and Easy)
Shortbread pie crust is so much easier than you imagined! This easy pie crust recipe will take major work out of making dough for a sweet pie (savory is easy, too!)

This recipe was originally published on November 30th, 2011.
I originally published this shortbread pie crust recipe as “one minute pie pastry”, not realizing that no one uses those terms to search for how to make a pie crust (ugh, the perils of starting a website without understanding how everything works!)
As an Amazon Associate I earn from qualifying purchases.

So I’m revising the text, but not the recipe because it’s a traditional and classic British short crust pastry recipe that works every time for flaky and delicious results.
This is made using a food processor, but the classic method using two knives and your hands is also an option. Both methods will yield a PERFECT HOMEMADE PIE CRUST, for either sweet or savory pie. For the handmade version, see the notes section in the printable recipe card below.
Okay, so by the time you take out the flour, weigh it (or measure it) and then pull a couple of sticks of butter from the fridge, you might actually be at TWO whole minutes invested in this easy pie crust recipe! However, the actual cutting in the butter and adding the water to make the pie crust is done in less than a minute.
My rhubarb pie made with this pie crust recipe with a little added sugar.

And here’s a savory British steak pie I made using the same pie crust recipe.

If you have a food processor, but you’ll be utterly amazed at how easy and quickly that baby makes pie dough! No more wondering how to make a homemade pie crust, this is the recipe you’ve been searching for.

In addition to being a quick and easy shortbread crust recipe, you won’t believe how much better a homemade creation tastes over a store-bought, or premade crust. It also will not have any questionable ingredients like preservatives and dough conditioners.

And don’t forget that savory pies using a homemade pie crust are a delicious option for a make ahead meal, or a dinner to freeze for a later date, like chicken, brie and cranberry pie, or steak pie.
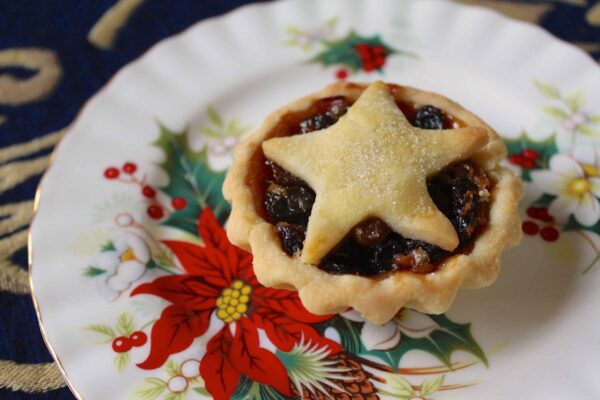
It’s also the pastry I use to make mince pies for Christmas, or strawberry tarts, during the summer.

What is the Difference Between Pie Crust and Shortbread Crust?
There’s absolutely no difference between pie crust and shortbread crust. You can make a sweet pie crust or sweet shortbread crust or just omit the sugar and make a crust for savory pie fillings.
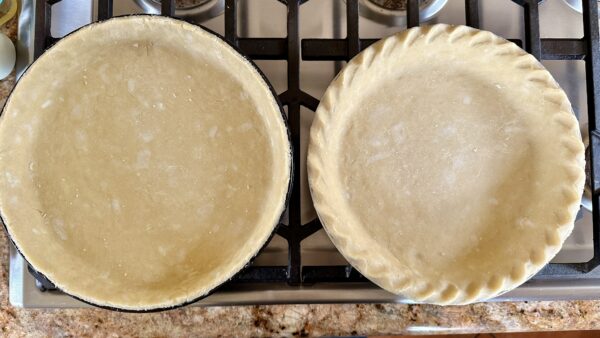
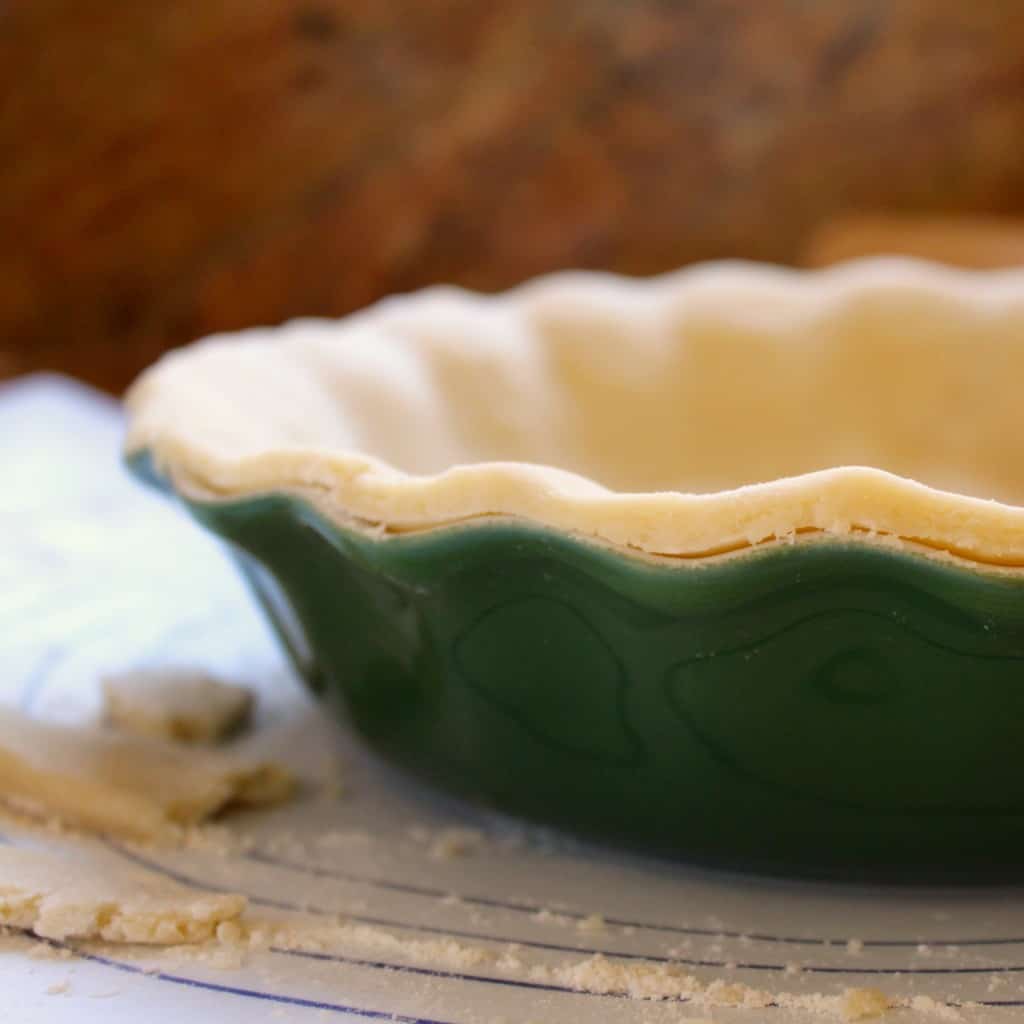
Tart crust and pie crust, ready for the oven, or to be filled.
How to Make Shortbread Pie Crust in Under One Minute
It’s beyond easy to make a food processor pie crust, and you’ll be making pies like nobody’s business! Just add the few ingredients to the food processor, and press the button, that’s it! Adding ice water is the last step and you’ll be presented with a perfect ball of pie crust dough! (This is the food processor I have, but it may be too big for many smaller kitchens.)
Try this custard peach pie and enjoy rave reviews every time!

No messy hands, or dough under your fingernails, just a lovely homemade dough to roll out and use to make your favorite pies. Some people are searching for “shortbread cookie pie crust” and this is what you’re looking for! By the way, learn why I never call shortbread a cookie in my shortbread recipe post.
This is my favorite British apple pie! It really is the best homemade pie crust recipe you’ll find.

Shortbread Pie Crust Recipe
adapted from Mrs. Beeton’s Cookery
makes one double pie crust dough (top and bottom) or 24 tartlet shells
FULL PRINTABLE RECIPE BELOW
Ingredients
- flour
- butter (optional: lard)
- sugar
- salt
- ice water
Savory pie? Omit the sugar.
Special equipment: scale, food processor, rolling pin, (pie rolling mat-optional)
Directions to Make a Shortbread Pie Crust
As usual, I highly recommend a scale for best results. Cups are too unpredictable, especially for baking, and results will always vary.
Place all the dry ingredients, with the cold butter (see notes about using ½ butter and ½ lard) cut into chunks, into the food processor.

A few pulses and the butter is mixed in.

Next, add the ice water; a few more pulses and it is ready to roll (literally!)
Your pastry should look like this, and sort of come together, but still be somewhat crumbly when ready. Don’t add too much water, though, as it will make the crust tough. Shape the pie pastry into a ball, cover with cling wrap and refrigerate for at least half an hour. (If in a hurry, you can skip this step.)

Finally, just roll out the pie crust pastry and use as desired (detailed instructions below) for sweet dishes. If you want to use it for a savory pie or tart, you can simply omit the sugar to make it more suited for a savory filling like this bacon and cheese quiche.

Makes enough for one, double homemade pie crust (bottom and top). Another way to use the pastry is to make tartlets. This recipe will make about 24 tartlet shells, like these strawberry tarts.
How to Roll and Shape a Pie Crust into a Pan
NOTE: it is recommended to chill dough before rolling, and filling, however, if you simply haven’t the time, you can skip this step.
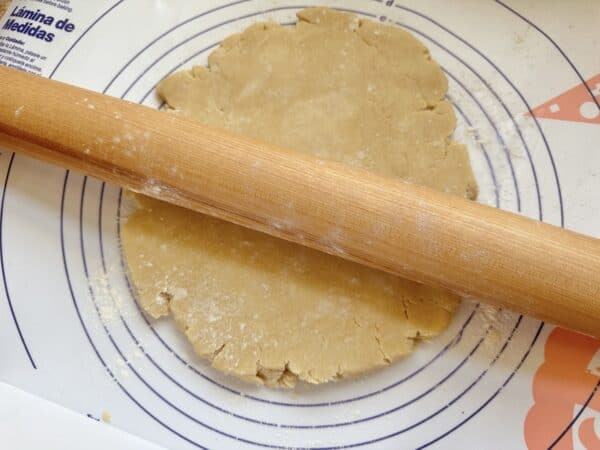
Place two thirds of the pie dough onto a work surface or pie rolling mat. Press the dough into a compact shape (don’t knead it) and start to use the rolling pin to press and roll it flat. Use your hands to pull the edges in so it doesn’t crack. Don’t roll back and forth over the center, instead, always try to roll from the center out.
Roll to your desired size. Don’t worry, the edges don’t need to be perfect.
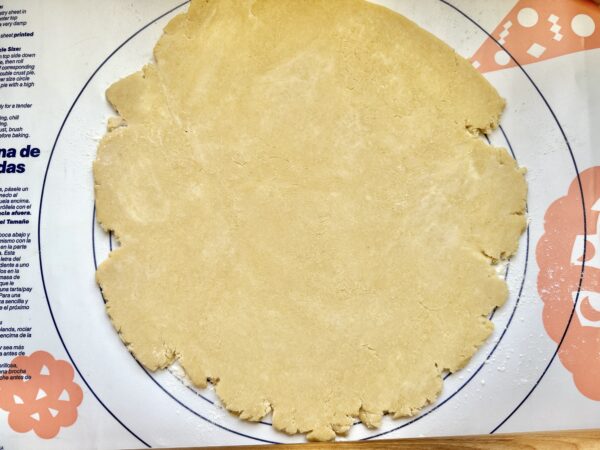
If you don’t have a rolling mat, use your pie pan as a guide (remember to roll larger than you need due to the edges.)

Using the rolling pin, roll the pastry onto the pin and carefully lift it over the pie plate.
How to Finish and Crimp the Pie Crust
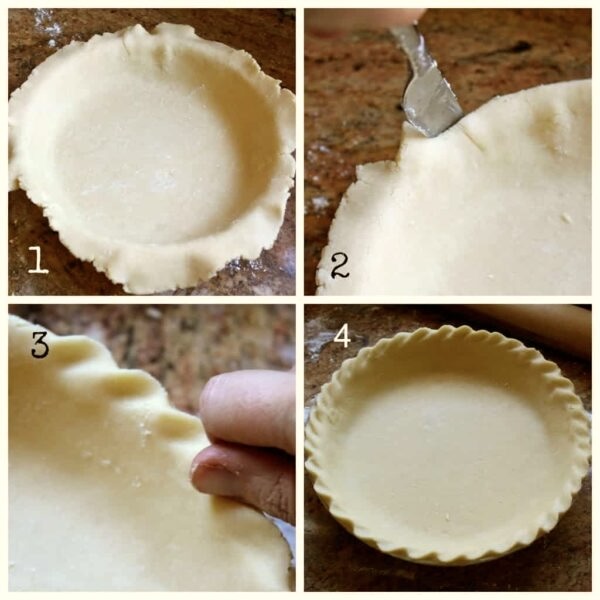
- Once the pie dough is over the pie dish, gently push the pastry so that it’s touching the pan all around. Don’t press too hard.
- Using a knife, cut the pastry close to the edge of the pie dish, using it as a guide. If making a double crust pie, roll the other third of the pie dough (with the scraps from the bottom) to make the top of the crust. Fill the pie tin, dampen the edge with water (use your finger or a pastry brush.) Gently lift the pastry from the rolling pin onto the pie dish. Lightly press the edge to seal, and cut a vent in the center of the pie. Now go to step 3.
- You can use any sort of crimping method you prefer, but a simple one is you press the edge of the dough between your thumb and index finger as seen in the photo above. Work your way around the dish until you end up where you started.
- Take a look at your work of art! Fix any cracks or imperfections as needed. You can chill, freeze or bake your pie at this time.
Leftover dough? Simply freeze it, or make decorations for your single crust pie as my daughter did for her pumpkin pie, along with sugared cranberries. (You can learn how to make the cranberries on my orange cranberry cake recipe.)

Baking a Pie Crust (Blind)
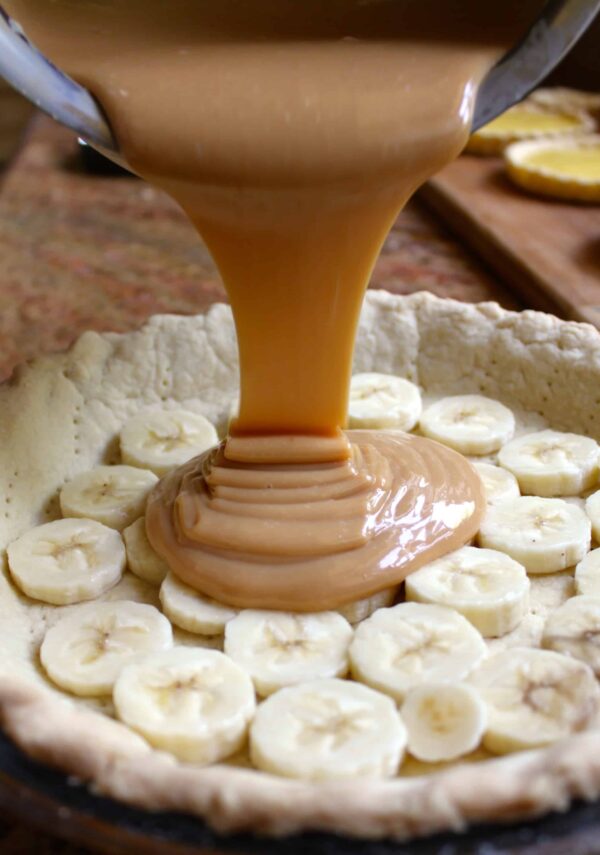
Blind baking means that you are baking the pie crust without any filling. Normally this is done for sweet pies, which are often filled with custards, fruit or no bake fillings. A banoffee pie is one example.
- Preheat the oven to 400F (200C)
- Place parchment paper inside the pie and fill with baking beads, rice or dry beans work as well (you can keep them to reuse.)
- Bake for 15 minutes then take out of the oven, remove the baking beads. If you like, you can brush the bottom of the crust with a beaten egg to seal it before placing back into the oven for another 5 minutes or until lightly golden in color. Ovens vary, so look at the pie crust to determine if it’s ready. Don’t just rely on the times listed here.
- Cool completely before filling as desired.
Double crust pie, sweet or savory. Follow the baking directions for the recipe you are making.
TIP: always cut a slit in the top of your pie, and brush with slightly beaten egg white for a beautifully golden brown, and shiny crust.
Can I Freeze Shortbread Pie Crust?
Yes! You can freeze the pie dough before baking (the compact dough can be wrapped in cling film, placed in a freezer bag and frozen for a month or so.) You can also freeze an unbaked or baked pie crust, much the same as you’d buy in the store.
As you can see, it’s really not difficult to make a shortbread pie crust if you use this recipe!

Use your beautiful homemade shortbread pie crust as desired. I have lots of recipes where this recipe is used, for example, this lovely Bakewell tart with its flay crust.

Sign up for my free subscription.
Shortbread Pie Crust in Under a Minute
Special Equipment
Ingredients
- 3 ⅔ c flour if using cups, the water may vary more
- 8 oz unsalted butter 2 sticks (or half butter and half lard) see notes
- ⅛ tsp salt if you use salted butter, omit the salt
- 6 Tbsp water (ice water) more, or less, as needed
- 2 tsp sugar (OPTIONAL: only use for a sweet pie!)
Instructions
PLEASE READ THE NOTES FOR BEST RESULTS!
- Place all the dry ingredients, with the cold butter cut into chunks, into the food processor. After a few pulses, the butter is mixed in.
- Next, add the ice water a little at a time; a few more pulses and it is ready to roll (literally)! Don't add too much water right away, you can always add more, but you can't take it out. Your pastry will sort of come together, but still be somewhat crumbly when ready (see pics in body of recipe.) Too much water will make the crust tough.
- Shape the shortbread pie pastry into a ball on the counter, but do not knead. Cover with cling wrap and refrigerate for at least 20 minutes. If I'm in a hurry I skip this without any trouble.
- Finally, press the dough onto a flour dusted countertop and roll out the pie crust pastry to the desired size. If making a top and bottom crust, use ⅔ for the bottom, and ⅓ for the top.
- Use as desired for savory dishes or sweet.
- Makes enough for one, double homemade pie crust (bottom and top). Another way to use the pastry is to make tartlets. This recipe will make about 24 tartlet shells.
Notes
- If you want to use the crust for a savory pie or tart, just omit the sugar.
- To make a richer crust, add an egg yolk instead of the water. Beat the egg yolk and add it to the dry ingredients. Continue to make as the rest of the recipe.
- As always, I highly recommend a kitchen scale for best results. Cups are too unpredictable, especially for baking, and results will always vary.
- HANDMADE RECIPE: using two butter knives, cut the butter into the flour until you only have small pieces. Using your hands, rub the pieces of butter into the flour until it is completely worked in like breadcrumbs. At this point, start adding in the ice water and mixing together until there is enough to have the pastry dough come together. Place on countertop, form a ball and refrigerate for at least 20 minutes. Use as needed.
- If you want to go old school, use half the amount of butter and half lard. The lard helps create a more flaky crust, the butter helps with flavor. It's a good combination, imho.
- NUTRITION INFORMATION IS FOR A SAVORY PIE (no sugar)
Nutrition
Christina’s Cucina is a participant in the Amazon Services LLC Associates Program, an affiliate advertising program designed to provide a means for sites to earn advertising fees by advertising and linking to Amazon.com.
Hi Christina, I ALWAYS have a terrible time w/ this recipe even though I follow it to the letter. Each time I take it out of the fridge it’s just the same crumbly mess that I put in the fridge, so I end up tossing it away and using store bought dough. I’ve tried adding more water than the recipe calls for, up to 1/2 a cup or more and then the consistency is much better but I wonder whats wrong w/ how you suggest making it, or the way I’m doing it
Hi Mike, this just doesn’t make sense. Half a cup of water is just too much, but it shouldn’t be crumbly when it’s going in the fridge. You need to figure out the happy medium. Don’t know what else to suggest :(
Thanks Christina, I realize it doesn’t make any sense, as any recipe I’ve ever followed worked properly as written so I thought maybe there was something amiss in the printing.
A few drops of ice water does nothing but evaporate, but when I add much more water the pastry starts to appear as in the picture you’ve provided.
I did check all the other comments before writing and was surprised to find just one other person with a similar problem.
( Linda, Dec. 27, 2020 ) There’s just no way a few drops of water into the food processor does anything useful.
Thank you for your reply. Mike
Here’s the problem: the amount of water needed is not a few drops and it’s not ½ cup, it’s somewhere in between. Because it will vary, I haven’t put an exact amount because then I’ll get comments saying it was too wet or too dry, so it’s a matter of adding the ice water until you get the correct consistency then stop. I literally just had a lady in Scotland post her teenage son’s beautiful apple pie using my recipe on Instagram. If you are on IG, I urge you to view the story on the_stonehouse_bakery. It even shows him rolling the top pie crust onto the pie.
What a well thought out response this was and so TRUE! This is why I love all your photos. I just recently discovered your site so I can’t speak to how many folks may be having trouble with the “amount of water”.. it’s a feel and consistency “thing” for sure. Perhaps if you had time to post a small 1 minute video on this page, of only that part of the recipe, it might be helpful to folks who are very visual?? Keep up the GREAT site I’m loving it!
I would love to, just not enough time to do videos atm. :)
Hi Christina & Michael,
I just made this crust for the first time, wife forwarded it to me as she is a subscriber.
The problem ‘I believe’ Micheal is in the verbiage “pulse”. At least it was for me! It took far longer to get the butter broken down than Christina indicates with a ‘few’ quick pulses. I added water 1, pulse 2, pulse 3, pulse 4, pulse 5, pulse…still drier than the desert. I locked on the food processor and voila. Added additional water until it was I would look for in a manually done pie shell, which is how I was shown (dad & grandma) & always have done in the past.
I will try it again as it certainly was less fatiguing however with muddling thru it wasn’t a time saver this time.
Reading this makes me realize it also depends on how powerful the food processor is, Ed. It will depend on that as well, so I will add this info to the post and hope it makes it more clear. Thanks for the comment!
wondering if #1, using butter and not other form, #2, are you putting the contents in processor and pulsing just to get together and then forming ball on plastic wrap to set/harden before rolling. I have had problems with other than butter and also, too little ICE water to bind. Hope you find your issues as this is a great pastry dough for most all .
good suggestions!! Also, is he using a scale?
I have made your delicious British apple pie twice now, but the crust keeps giving me problems :(. The first time I made it, I added 6 tbsp of ice water, but it was very crumbly after I had taken it out of the fridge, but I made it work. The second time I made the crust, I slowly added one tbsp of water at a time, and ended up with a total of 10 tbsp of water when the consistency looked good. After I had taken it out of the fridge and rolled out the dough, again it was crumbly :(. I had to shape the dough back into a ball and added a few more splashes of water. The pie still tasted delicious in the end, but I don’t know why I’m having issues with the crust? Any ideas?
Is this recipe for single or double crust? TY
It’s for one double pie crust, top and bottom. Enjoy!
Can you use half butter and half lard for the pie crust?
Yes! The only thing is I haven’t used lard with the processor method, so not sure if it will make a difference since it’s softer than butter out of the fridge. Let me know, Rogers.
Hi Christine, my problem starts after I take it out of the fridge. Should I leave it to come to room temperature before rolling or as some recipes suggest flatten it with the rolling pin before rolling. Thank you.
Hi Marion, I think you might be leaving it in the fridge too long if it’s gone hard. It shouldn’t be too cold when you take it out. Maybe your fridge is extra cold. So if it’s too hard to roll out, let it warm a bit before rolling it out. Good luck!